Getting Started
The Five-Step Flow
Each step builds on the one before it: enabling the module unlocks configuration, configuration produces a usable module, and a usable module is what turns into everyday CRM work.
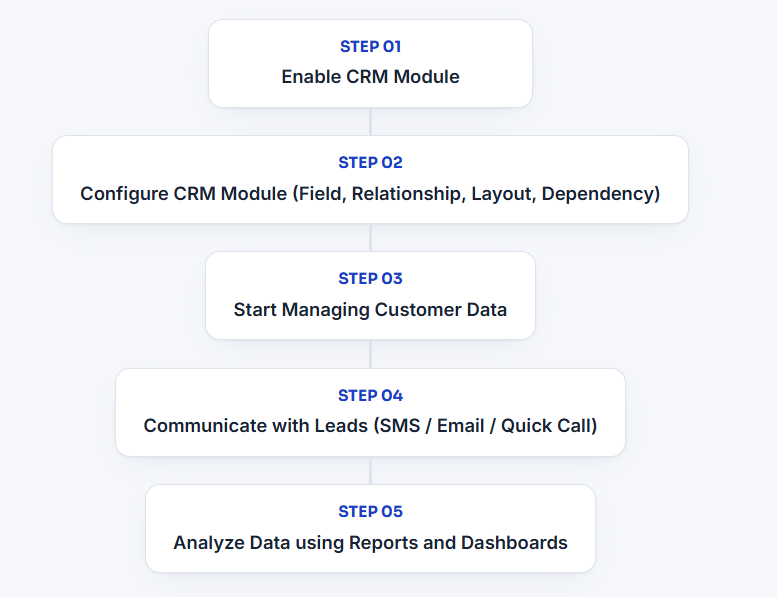
Step 1: Enable the CRM Module
By default, the CRM module is already enabled: a new environment ships with it switched on, so there is usually nothing to turn on before moving to Step 2. It's still worth knowing where that setting lives, since it's also where CRM would be re-enabled if it were ever switched off.
Path: Configuration → System → Modules
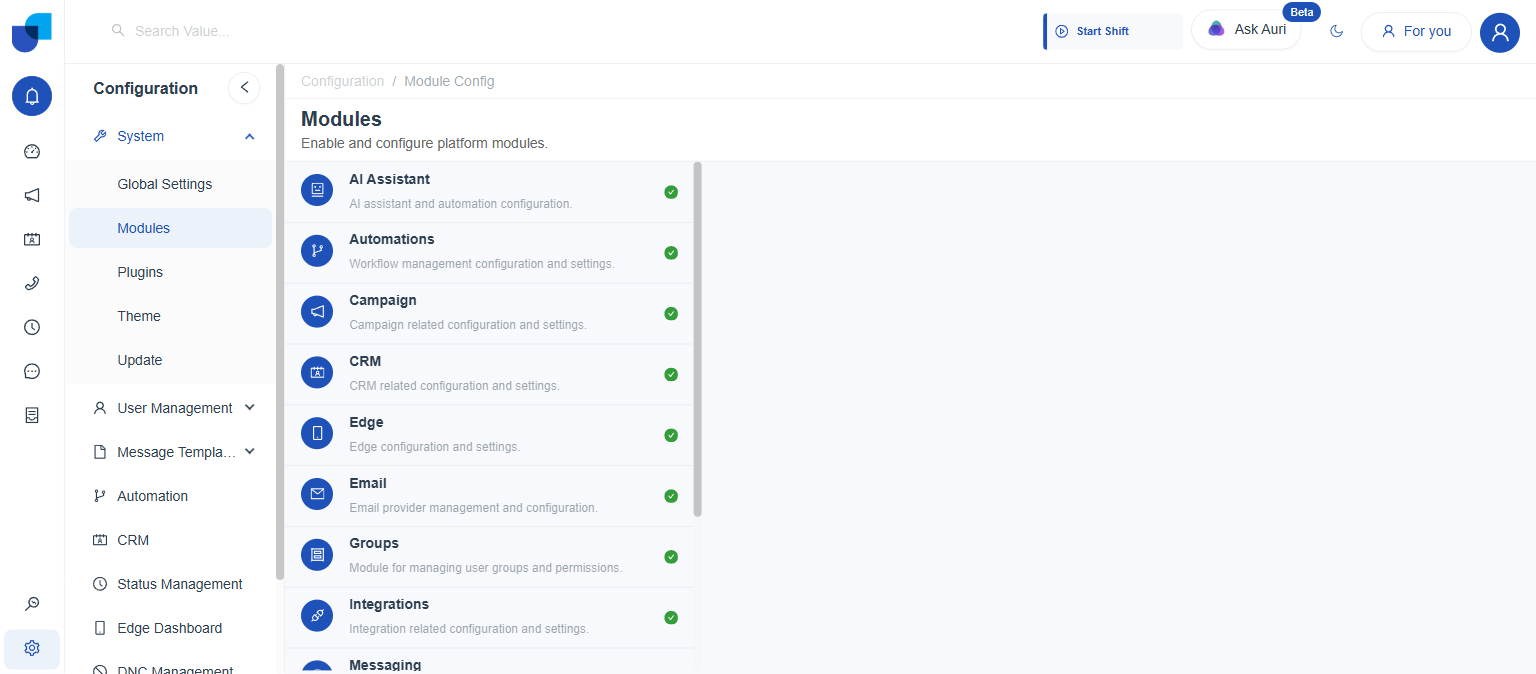 The Modules screen, confirming CRM already shows as enabled by default alongside every other platform module.
- Open Configuration → System → Modules. Every platform module is listed here, each already showing its current enabled or disabled state.
- Click CRM in the list. Its panel opens on the right with a description and an on/off toggle.
- Confirm the toggle is already on. By default it is; no further action is needed. If it were ever off, this is where an administrator would switch it back on and click Save Configuration.
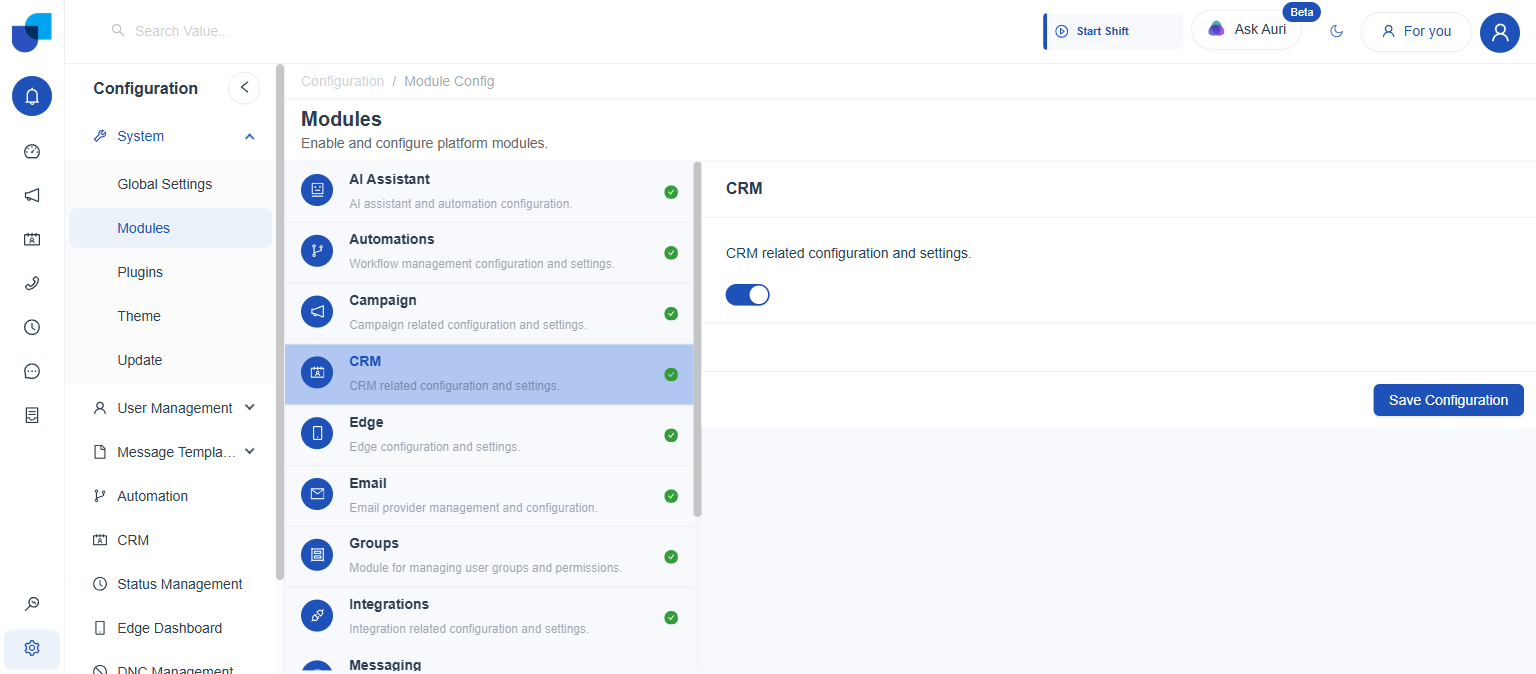 The CRM module's own panel: description, its toggle already switched on, and Save Configuration.
Enabling CRM also covers its related built-in and custom modules: Contacts, Organizations, Leads, Tickets, and any modules created afterward all become available together once CRM itself is enabled.
Step 2: Configure CRM Module (Field, Relationship, Layout, Dependency)
Once CRM is confirmed enabled, configuration happens under Configuration → CRM. This is where a module actually gets shaped into something a business can use, across four building blocks:
- Field: add the custom fields a module needs to capture, choosing from the 13 available field types and setting each one's validation, required, unique, and read-only behavior.
- Relationship: connect modules to each other, picking the cardinality (One to One, One to Many, Many to One, or Many to Many) that matches the real relationship.
- Layout: arrange fields into sections, tables, and tabs using the Layout Builder, so records read clearly instead of as one long form.
- Dependency: set rules that show, hide, or require a field based on the value of another, keeping forms focused on what's actually relevant.
This configuration is what lets a business structure its customer data to match its own industry requirements, rather than adapting its process to a fixed template.
Step 3: Start Managing Customer Data
Once a module is configured, it's ready for real records. Managing customer data day to day means opening a module from the operational CRM navigation and adding, viewing, or updating records there — the same as any other record-keeping system, but backed by the fields and relationships just configured.
- Open the module from the CRM navigation. Contacts, Organizations, Tickets, and Leads each get their own entry alongside any custom modules.
- Click New to add a record. The creation form reflects exactly the fields configured in Step 2, including things like a Mobile Number field's country code selector.
- Fill in the record and Save. Add the customer's data into each field, including the Mobile Number's country code, then click Save to create the record.
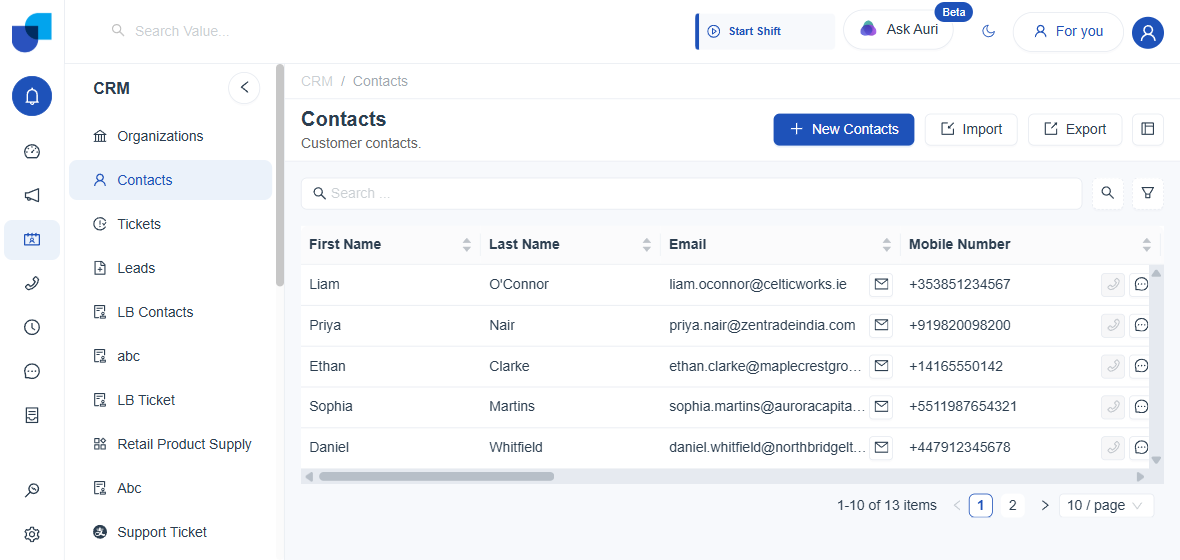
All customer-related details become centralized this way, making it easier for teams to manage and access information regardless of where a customer is based.
Step 4: Communicate with Leads (SMS / Email / Quick Call)
The CRM module includes quick communication tools for interacting with leads and customers without leaving the system. A user can:
- Send SMS messages to leads or customers
- Send Email communications
- Make a Quick Call directly from the system using the integrated Telephony module
These tools help teams respond faster and keep every customer communication in one place, right next to the record it relates to.
Step 5: Analyze Data using Reports and Dashboards
CRM activity and customer data can be analyzed through Reports and Dashboards inside the platform. A user can:
- Monitor sales and lead performance
- Track customer engagement
- Analyze business activities
- Make informed business decisions
That's the full loop: enable the module, configure it to match the business, start capturing real customer data, act on it through direct communication, then measure the results — all inside the same CRM module.