How to Configure a CRM Module
Configuration › CRM
Create a Module
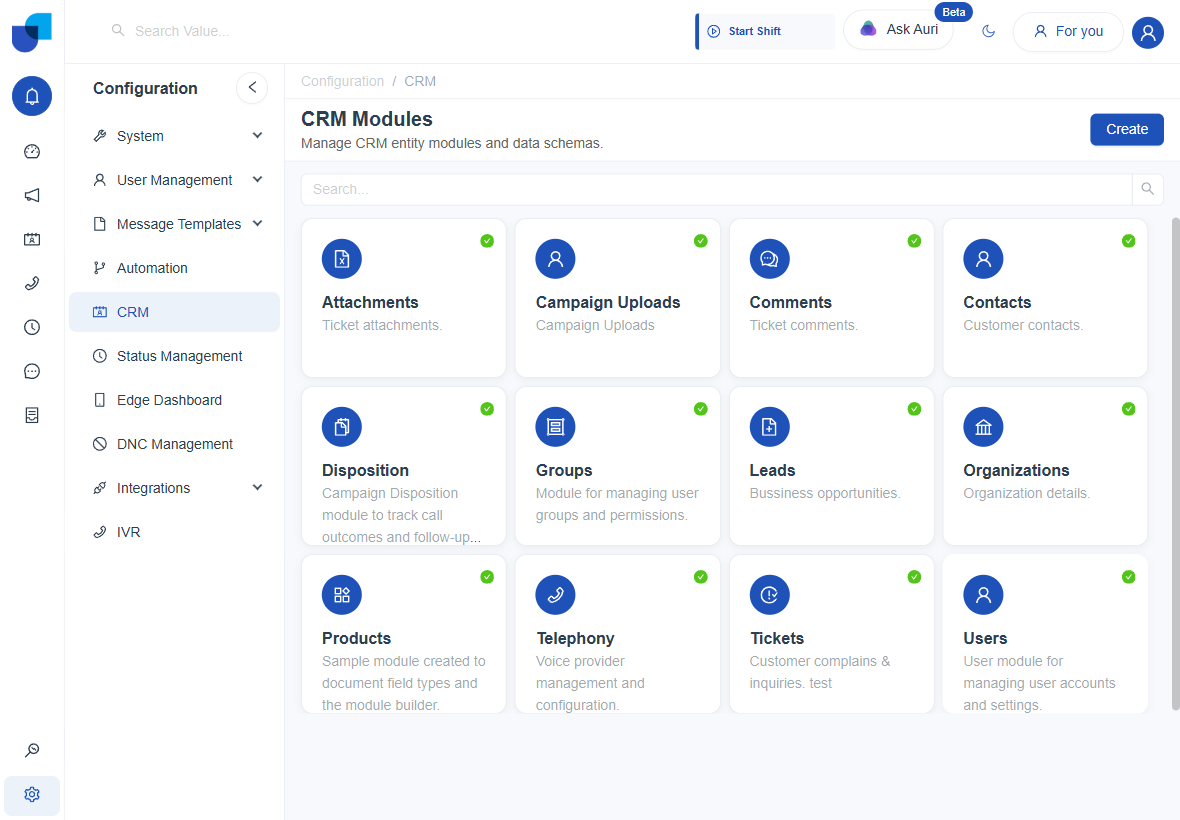
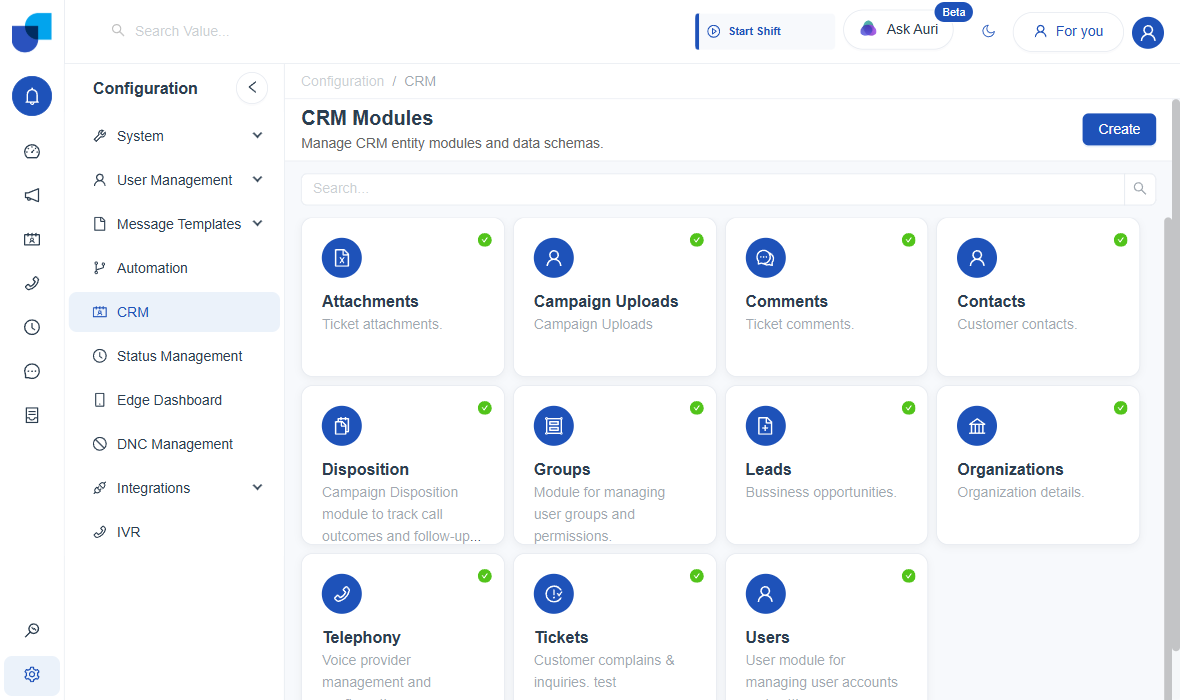
1. Open CRM configuration and click Create
Go to Configuration → CRM. Every module already in the system is listed here as a card. Click Create in the top right to start a new one.
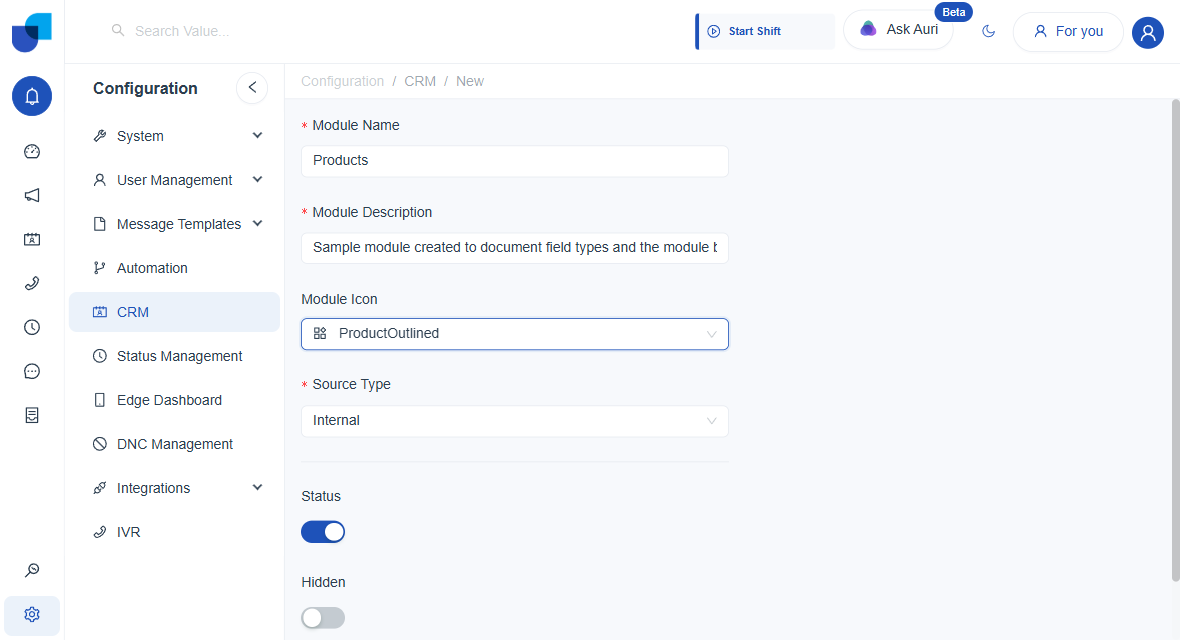
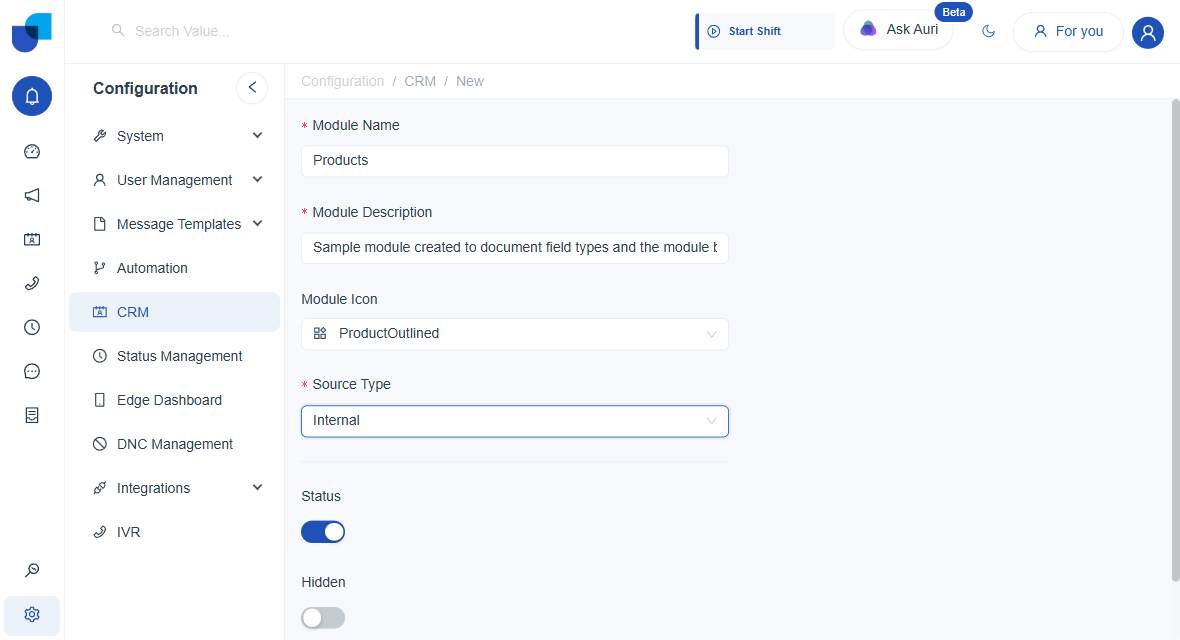
2. Fill in the module basics
Module Name is the label displayed throughout the entire system. It should be clear, concise, and easy for users to understand. Module Description is a short internal note about what the module is for. Module Icon picks the icon shown next to the module in menus and cards.
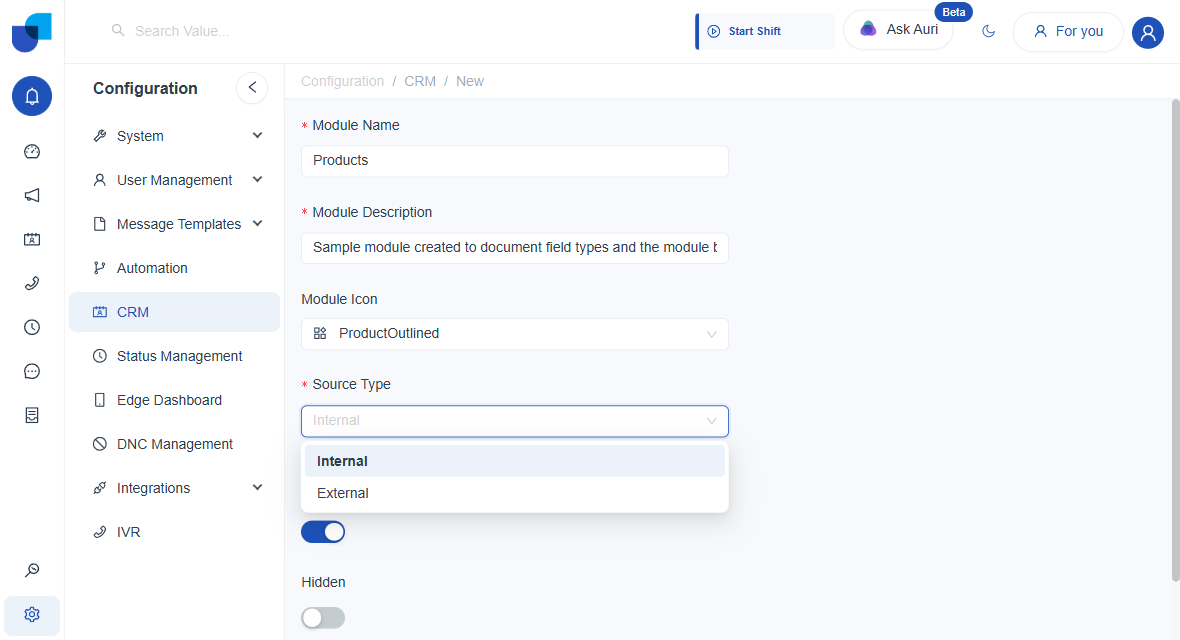
3. Choose a Source Type
Internal means records are created and managed entirely inside this system. External is used for modules where the records are stored in another connected system and are retrieved through an API integration.
4. Set Status, then Save
The Status toggle controls whether the module is active and usable right now. Leave Hidden off unless you want the module to exist but stay out of menus for the time being. Click Save to create it.
Once saved, the module gets its own configuration page with four tabs: Module, Fields, Layout Builder, and Dependencies.
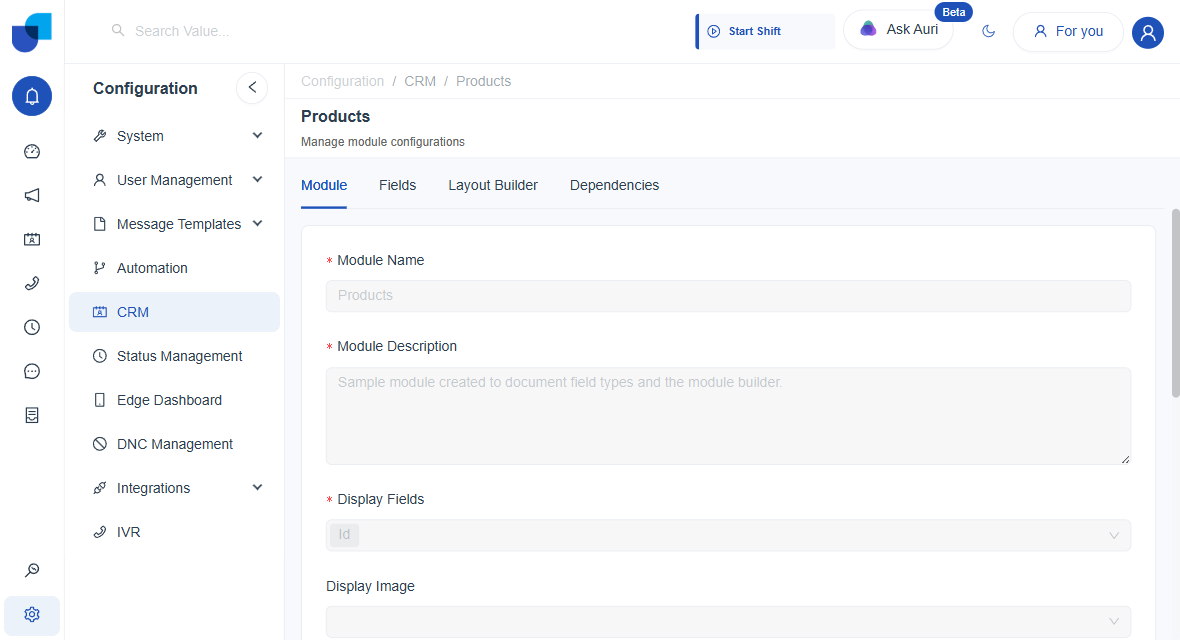 The freshly created Products module, ready to configure.