Records Management
Path: CRM › Products
Once a module exists, everything below covers working with its records day to day: creating one, viewing it, editing it, deleting it, filtering the list down, and moving records in and out with Import and Export. The steps below use the Products module created earlier in this guide as the example throughout.
1. Creating a Record
New records are added straight from the list view, in a panel that slides in from the right rather than a full page.
-
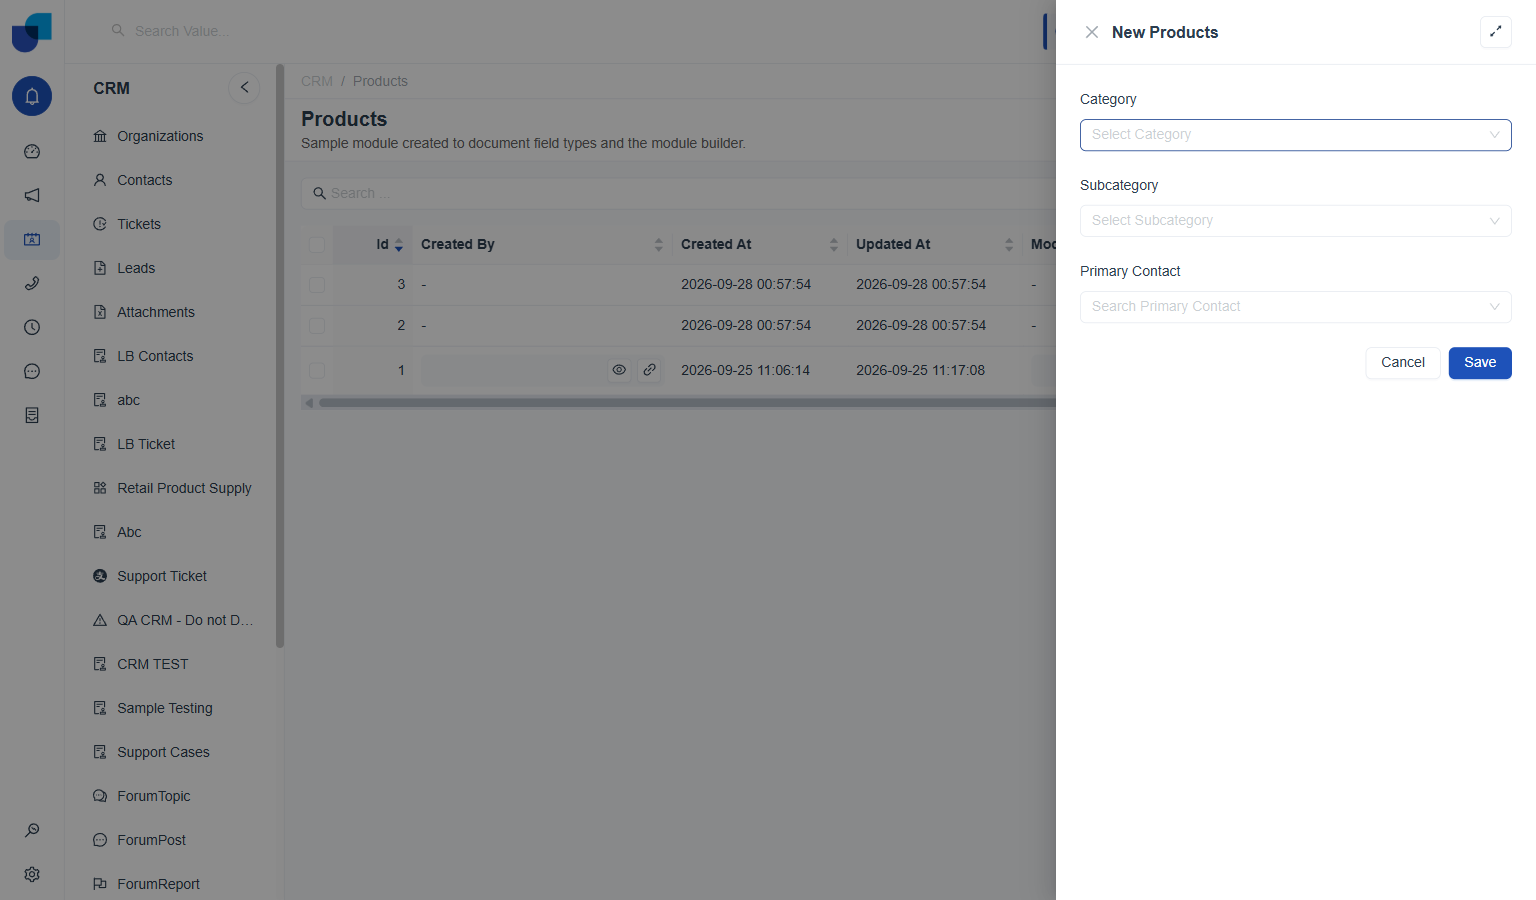
Click New Products. Sits above the list, to the left of Import and Export. The button's label always matches the module's own name.
-
Fill in each field. Only the fields configured on the module show up here. Enumeration fields like Category open as a dropdown of their set values.
-
Watch for dependent fields. Picking Electronics under Category automatically sets Subcategory to Laptops on its own, since a Dropdown Dependency links the two. A field wired up this way never needs to be touched by hand when only one match is possible.
-
Search and pick a relationship field. Primary Contact works as a live search: typing a few letters of a name, e.g. Liam, narrows the list to matching Contacts records to choose from.
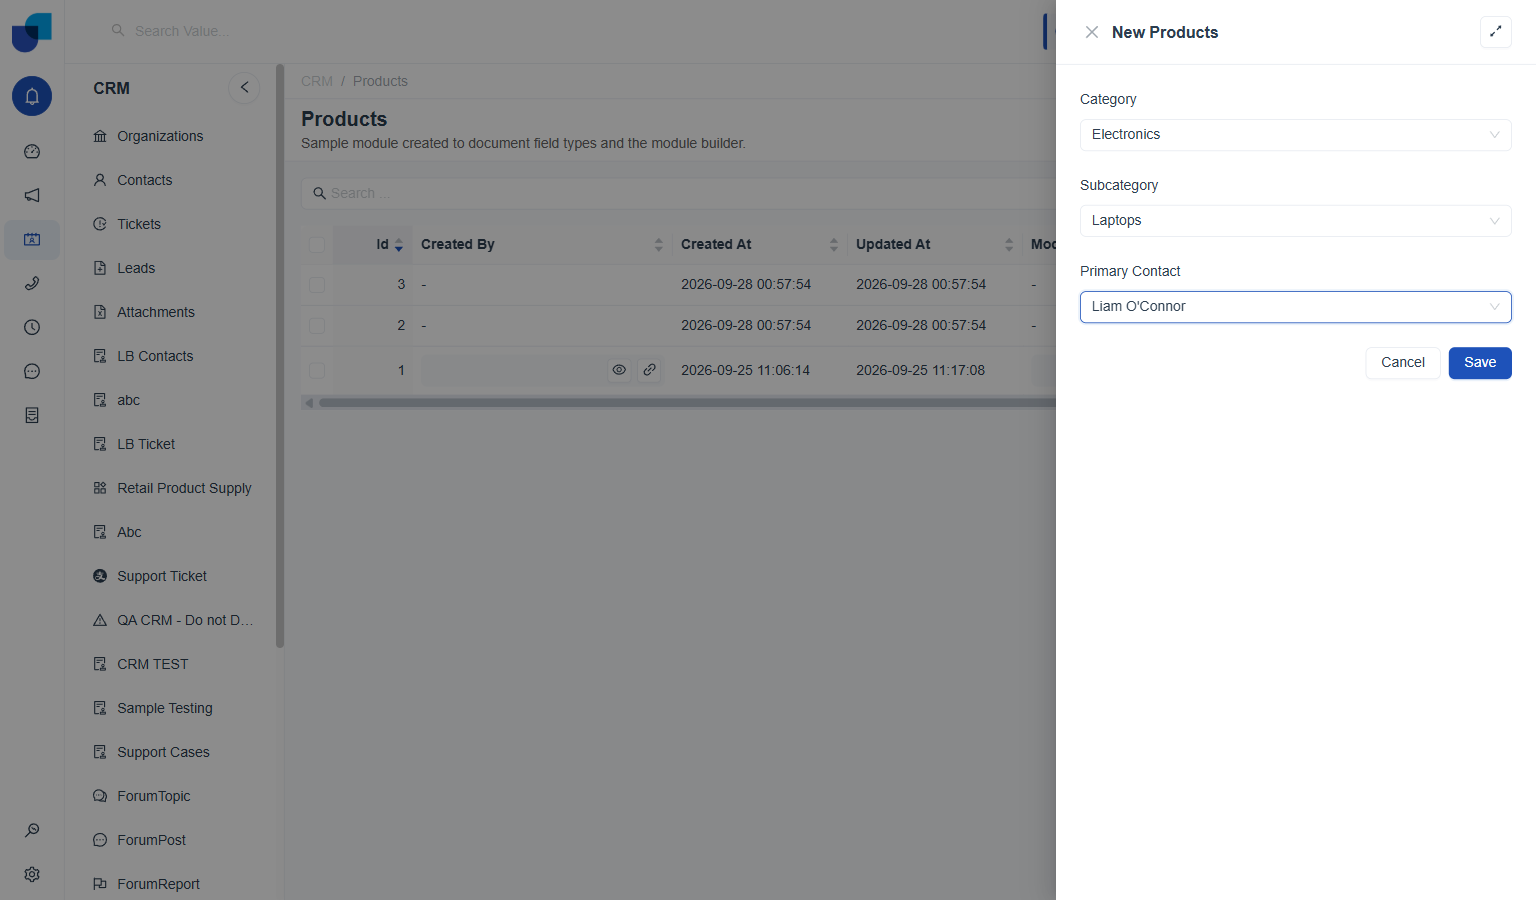 Subcategory filled itself in the moment Electronics was picked; only Primary Contact needed a manual search.
 -
Click Save.
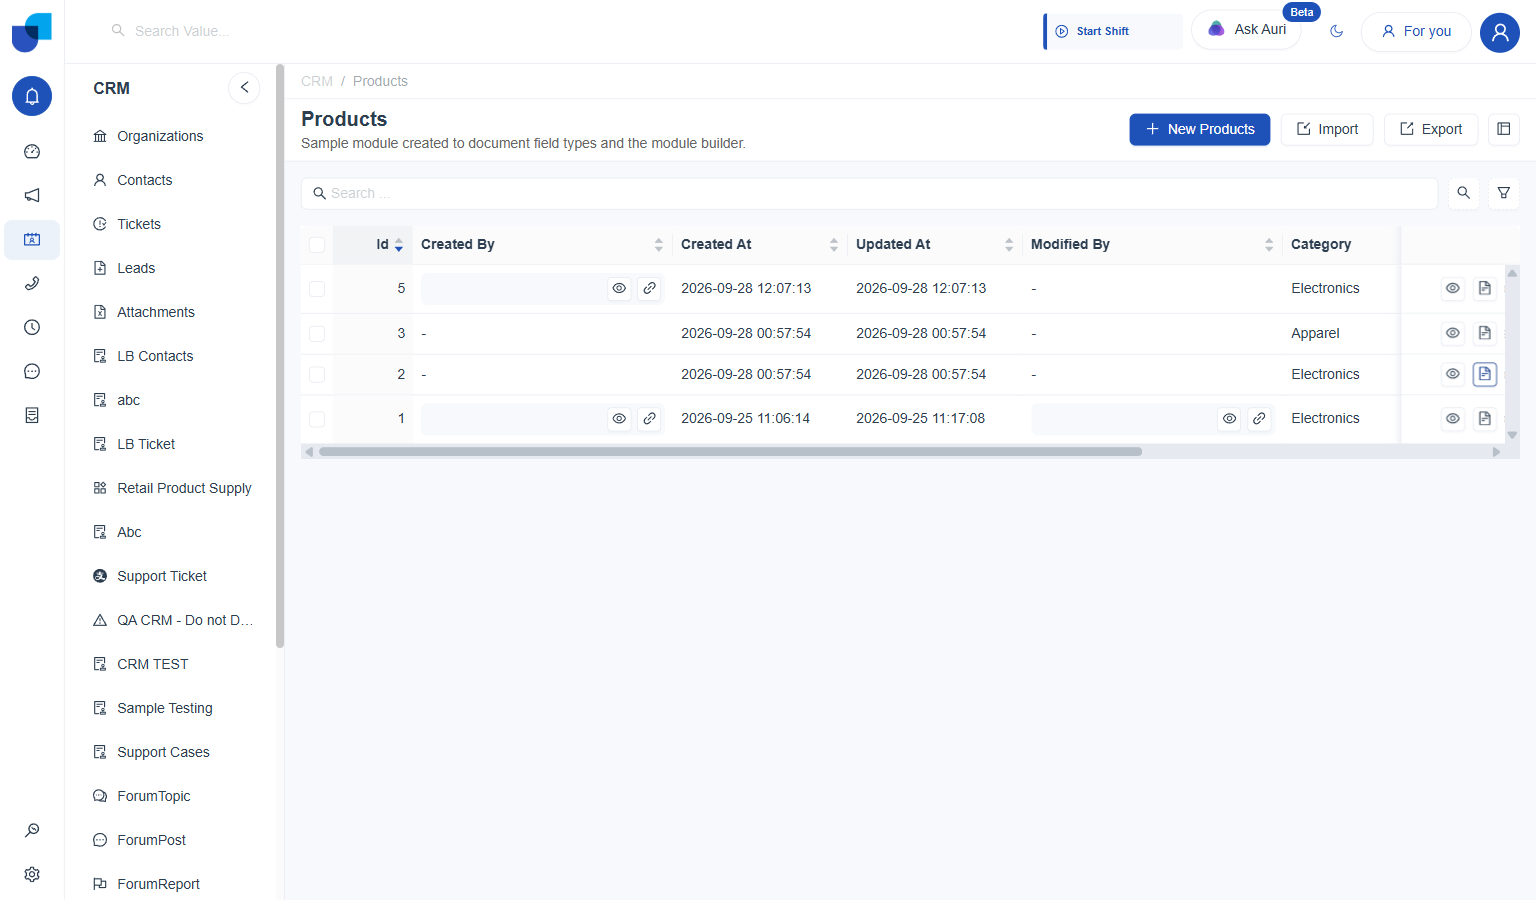 The new record lands at the top of the list the moment it saves, with a fresh Id and timestamps.
2. Viewing a Record
Every record has its own full page, opened from the eye icon at the end of its row in the list.
-
Click the eye icon on a row. Opens straight to that record's own page, at its own URL.
-
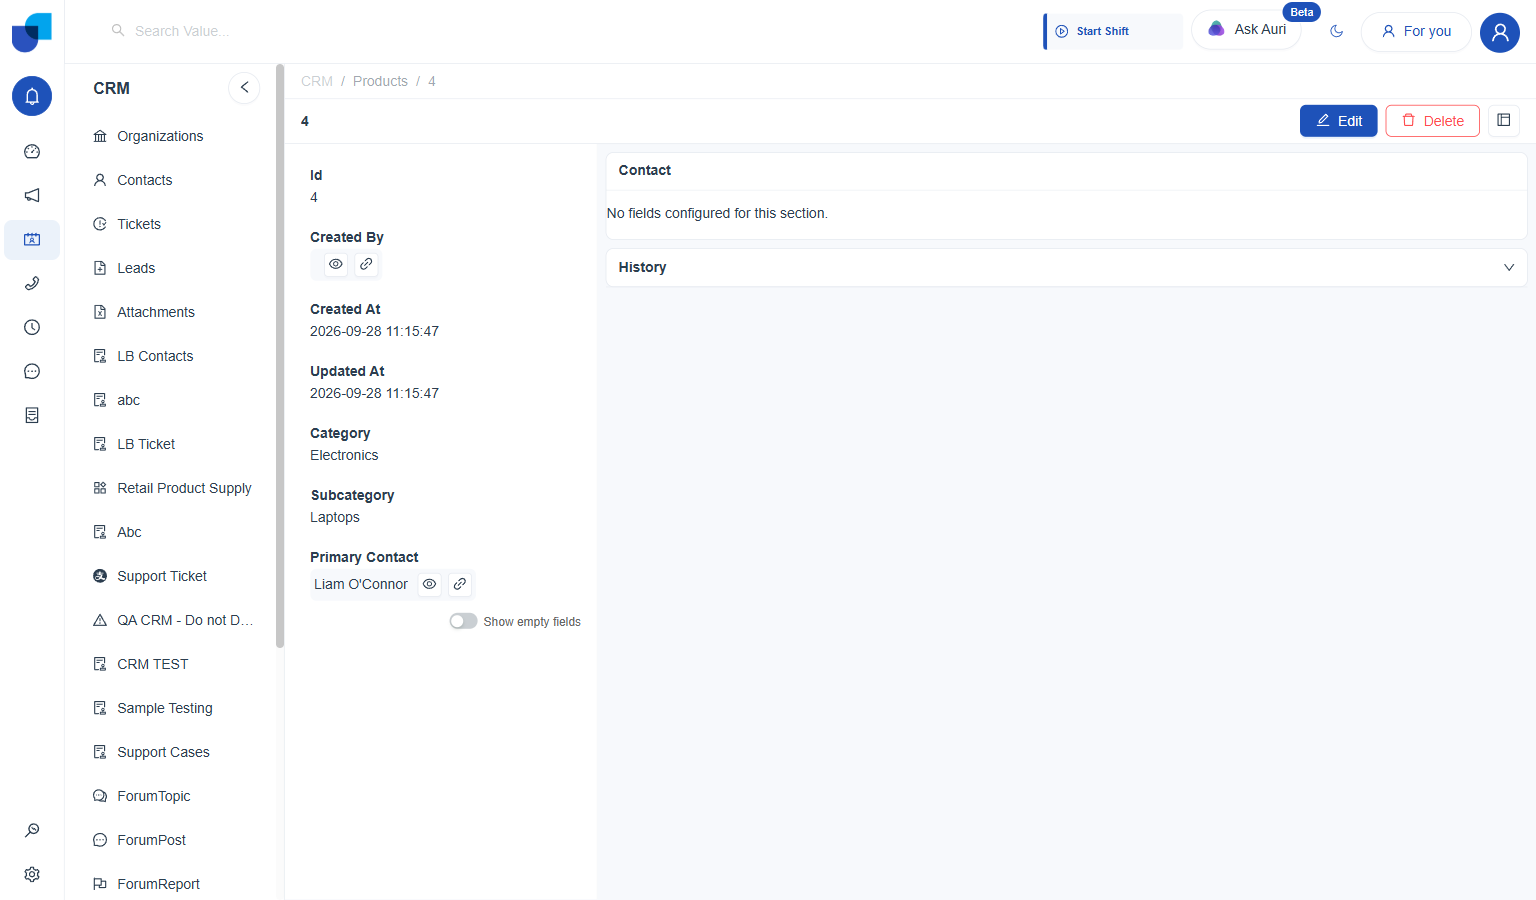
Read the fields down the left. Id, Created By, Created At, Updated At, Modified By, then every custom field on the module, each with its current value.
-
Toggle Show empty fields, if needed. Off by default; fields with no value stay hidden until switched on.
-
Expand History for the full audit trail. Every CREATE and UPDATE event is listed with a timestamp, showing exactly which fields changed and what they changed from and to.
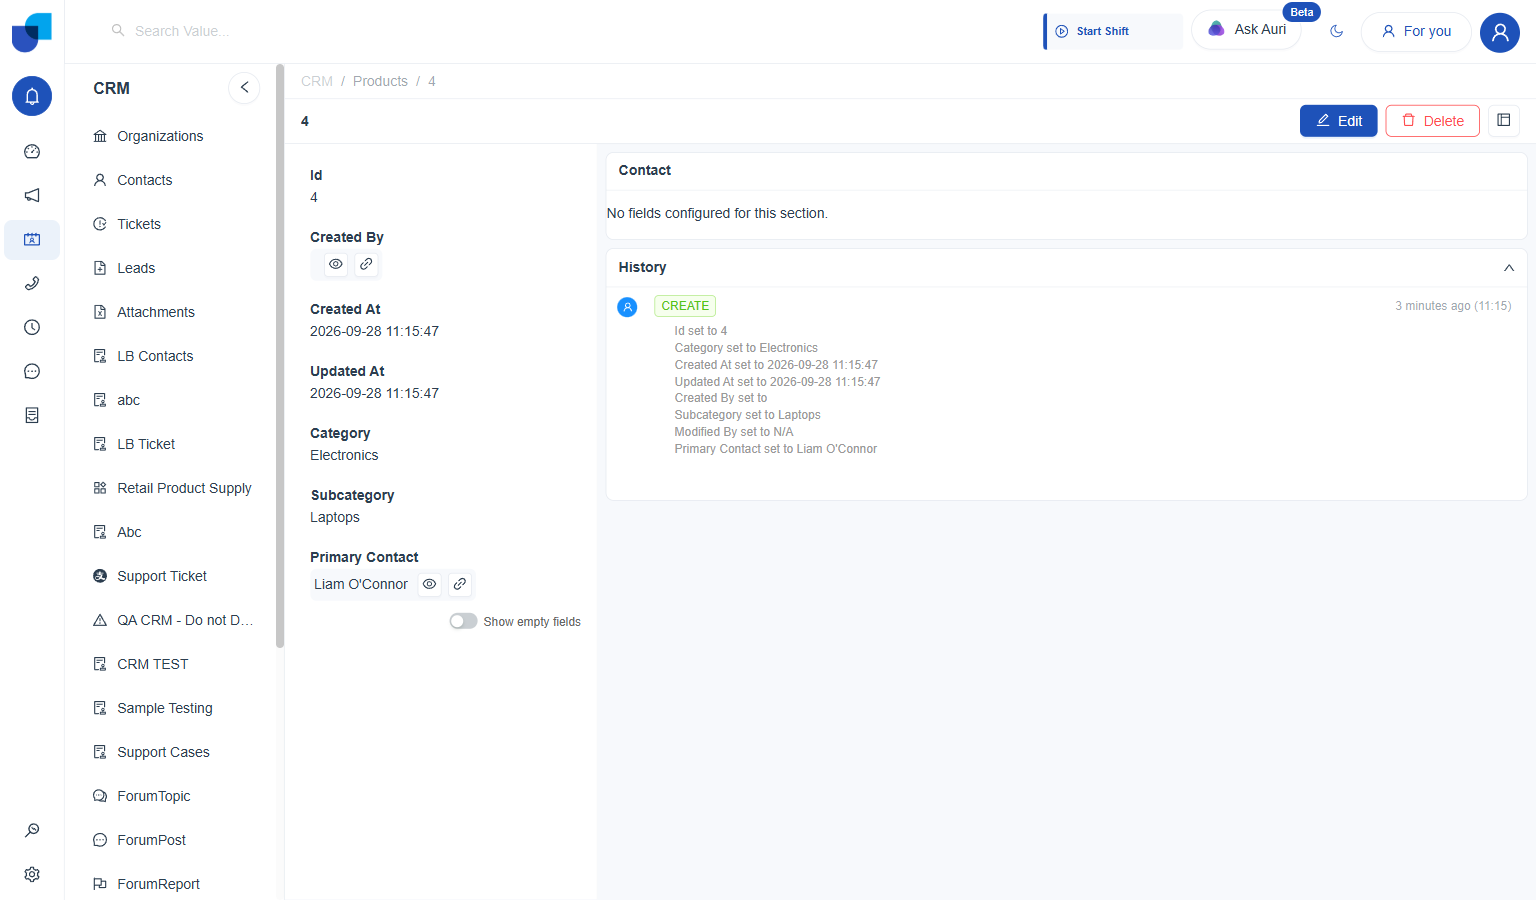 History reads newest first; each entry lists only the fields that actually changed in that event.
3. Editing a Record
Editing reuses the same slide-in panel as creating a record, pre-filled with whatever is already saved.
-
Open the record, then click Edit. Sits at the top right of the record's own page, next to Delete.
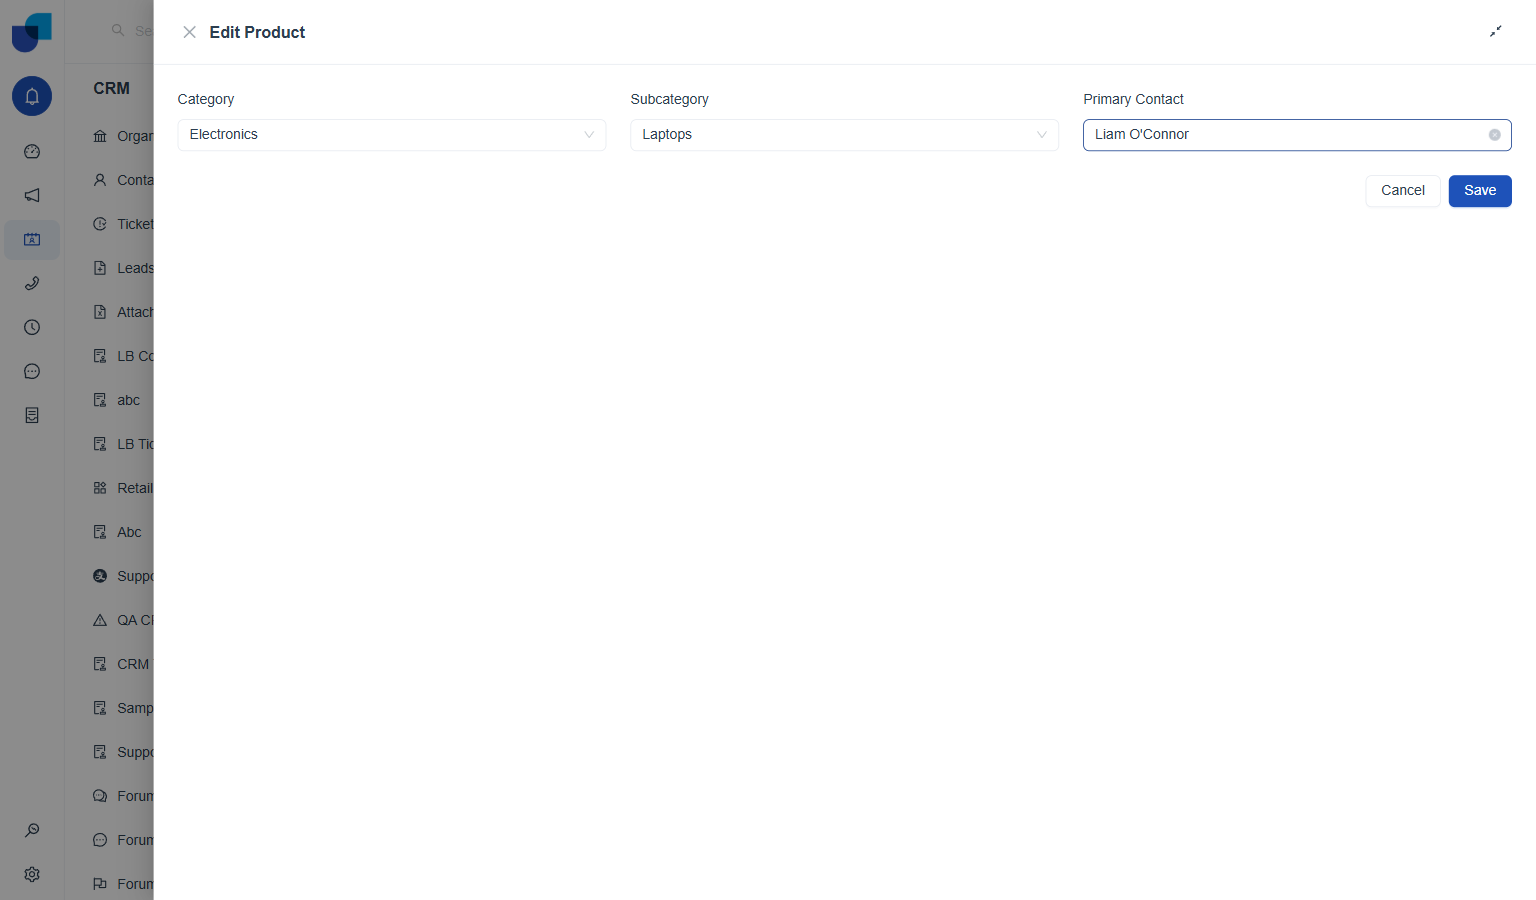
-
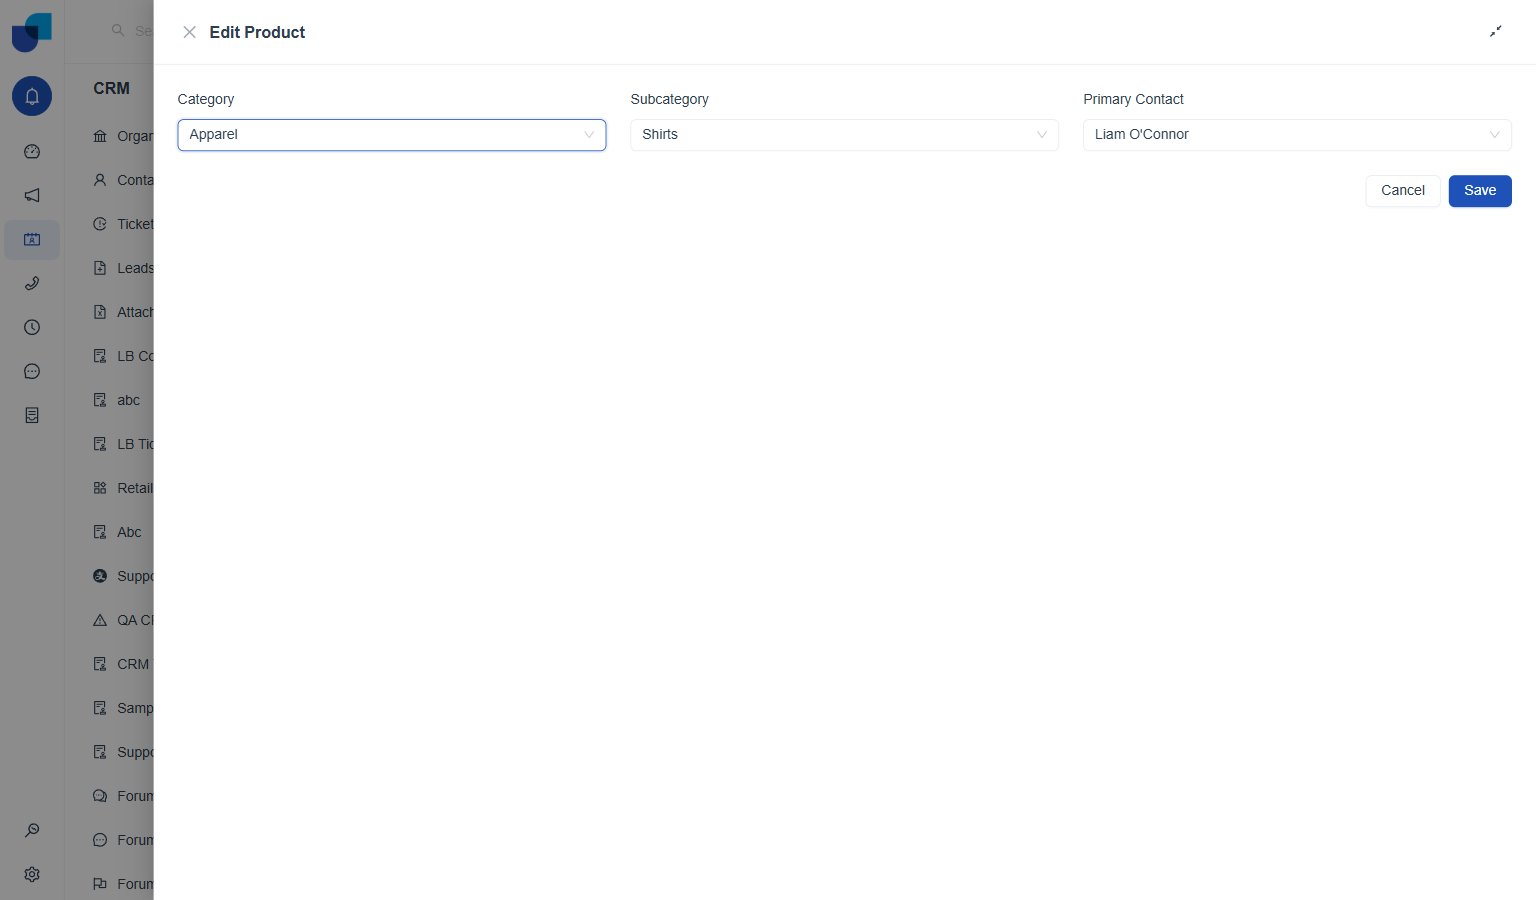
Change whatever needs updating. Changing Category to Apparel here also updates Subcategory on its own, the same dependency behavior seen when creating a record.
-
Click Save.
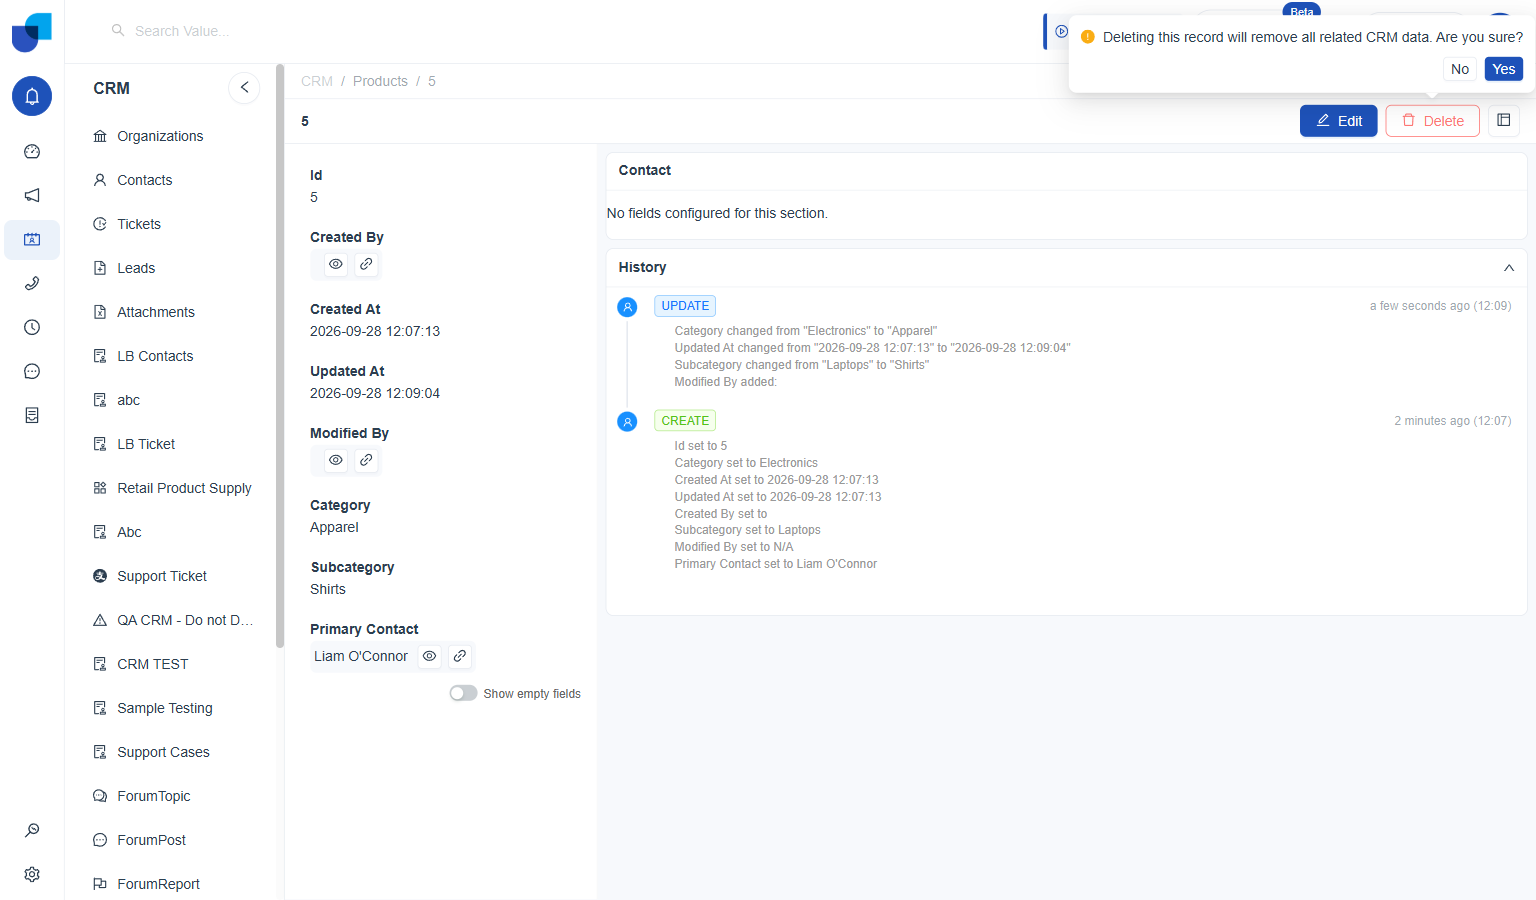
The record's page reflects the new values immediately, and History gains a matching UPDATE entry:
The UPDATE entry lists only what changed: Category, Subcategory, and Updated At.
4. Deleting a Record
Deleting a single record carries a lighter confirmation than deleting an entire module: a simple Yes or No rather than typing a name.
-
Open the record, then click Delete. Sits next to Edit, at the top right of the record's own page.
-
Confirm the warning. A small prompt asks "Deleting this record will remove all related CRM data. Are you sure?" with No and Yes.
-
Click Yes. The record is removed immediately and the page returns to the list.
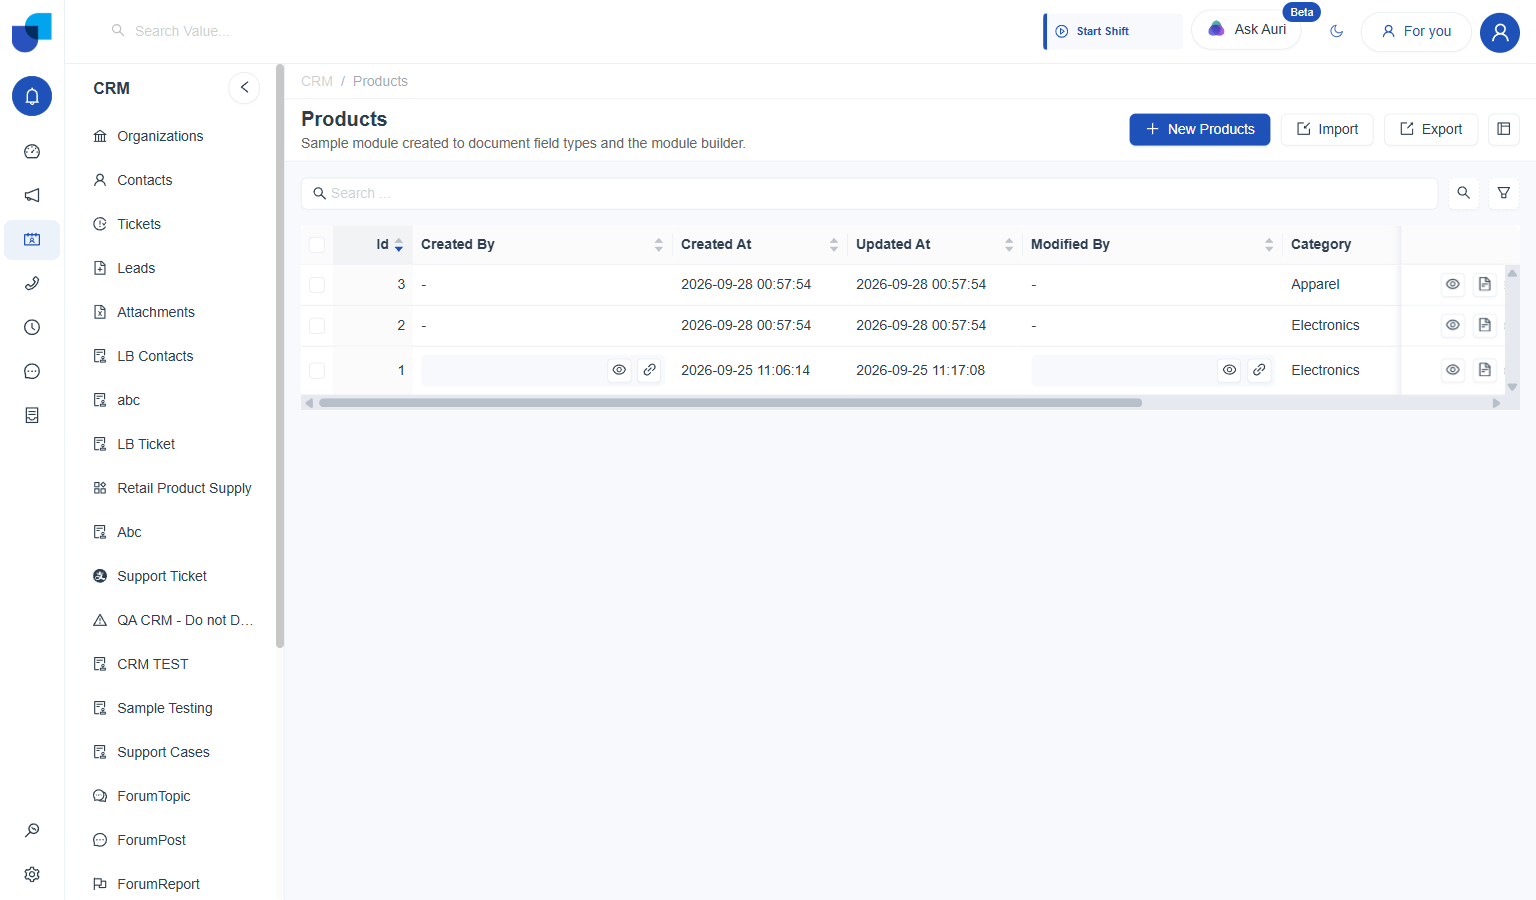
There is no undo. Once Yes is clicked, the record and anything tied to it through a relationship field pointing at it are gone for good.
5. Filtering Records
Separate from a layout's own Default Filter, every list view carries its own filter icon, letting anyone browsing that list narrow it down on the spot, without editing the layout at all.
-
Click the filter icon. Sits next to the search box, on the Products list page.
-
Open a field's condition. Every field on the module is listed, each with its own comparison (Equals, Is, In, and so on) matched to that field's type.
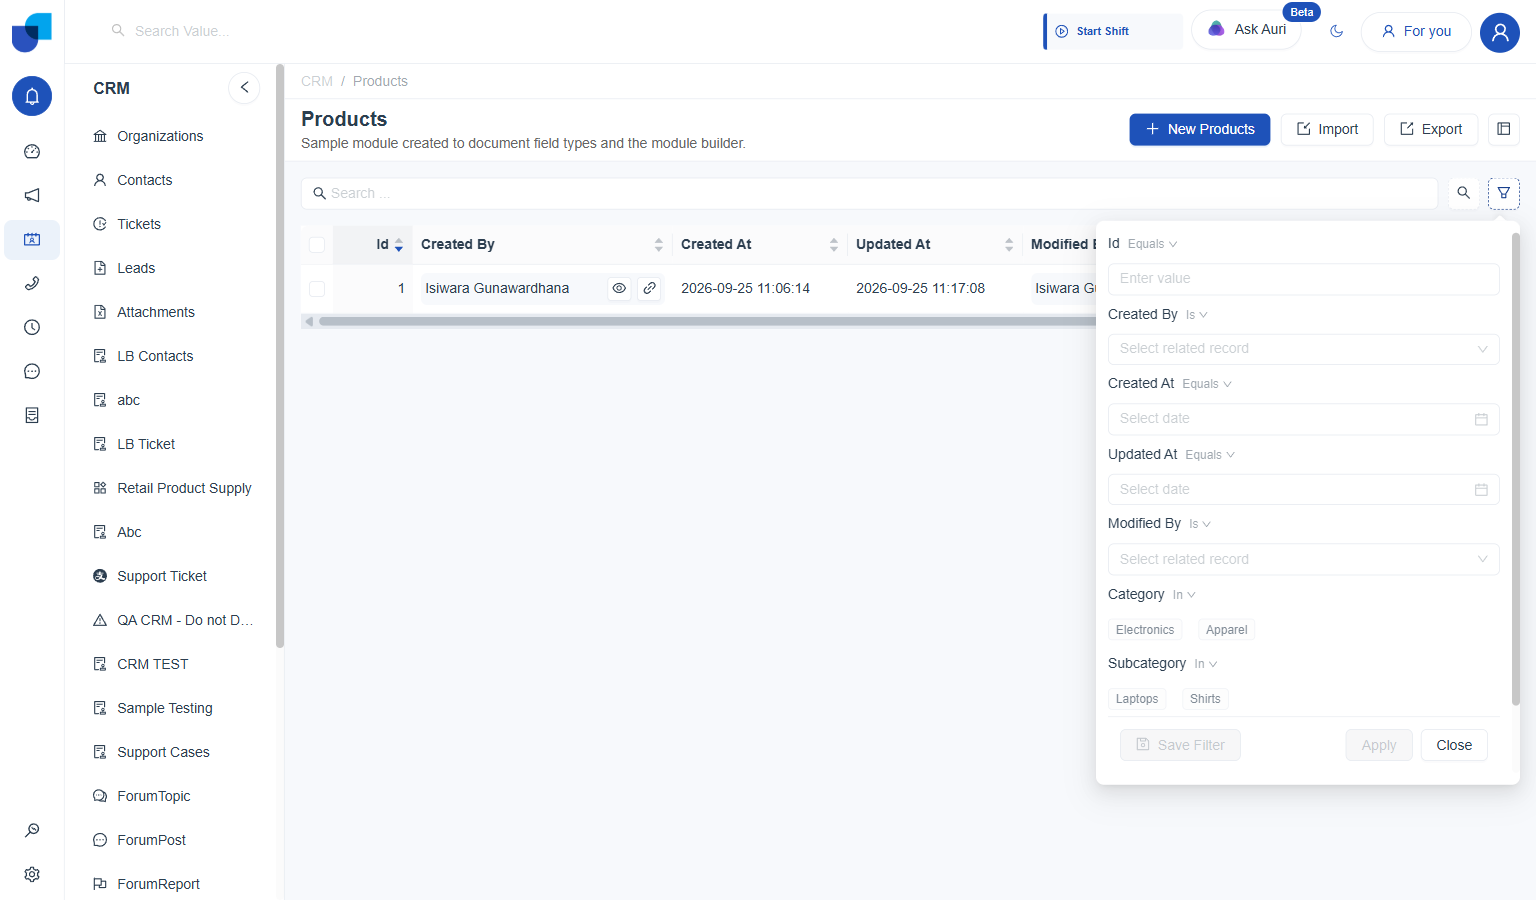 Before any value is picked, Save Filter and Apply both stay disabled.
 -
Pick a value. Enumeration fields like Category and Subcategory show their values as clickable chips; date fields show a picker; relationship fields show a record search. Picking Electronics under Category highlights that chip and enables Save Filter and Apply.
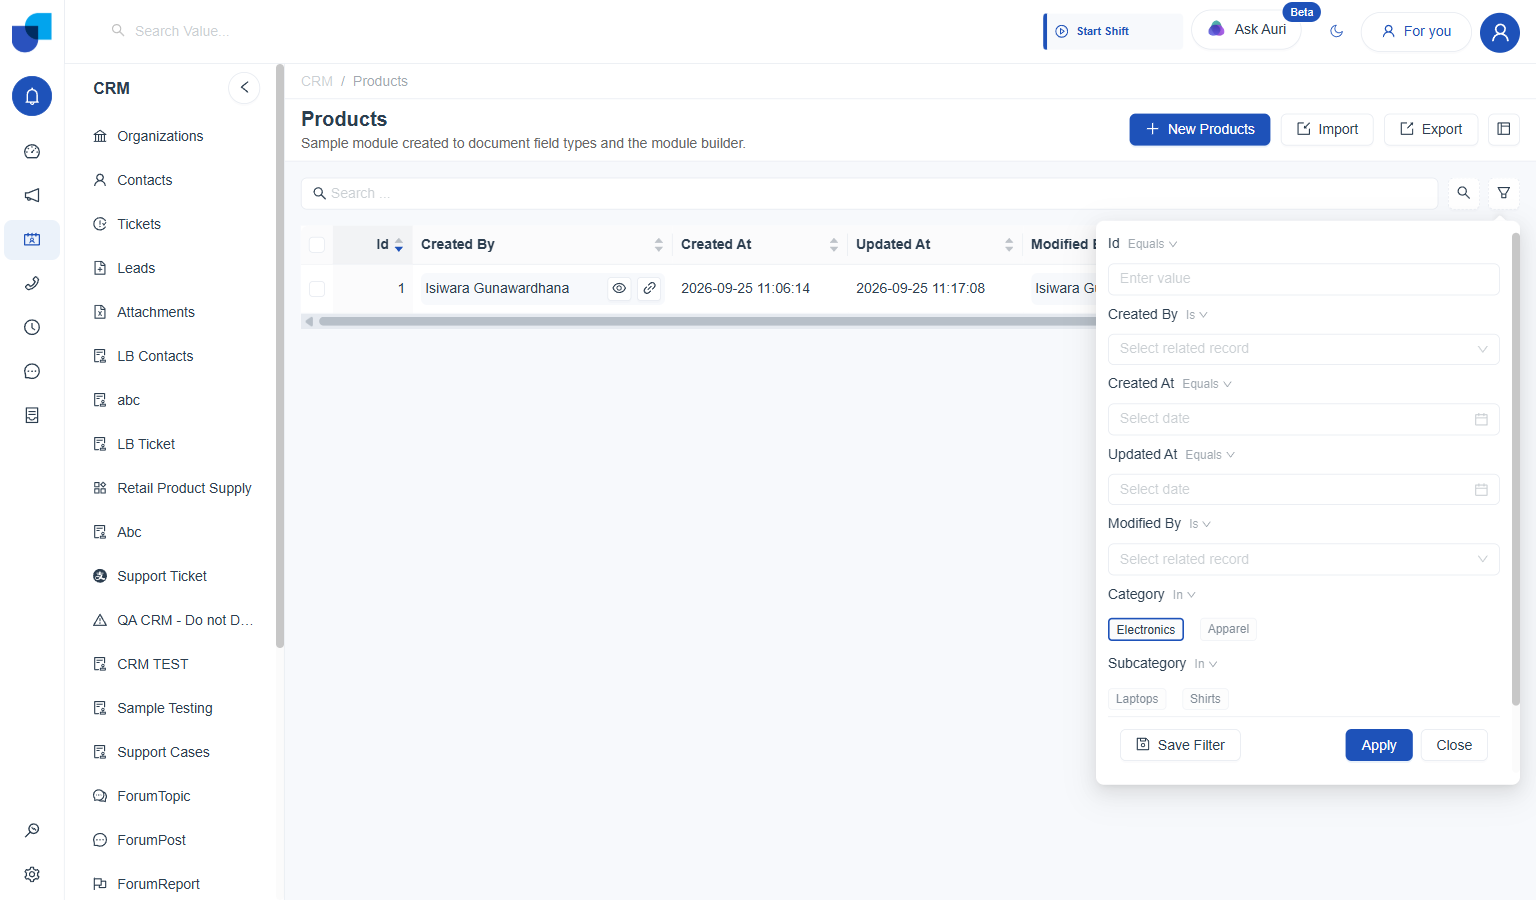
-
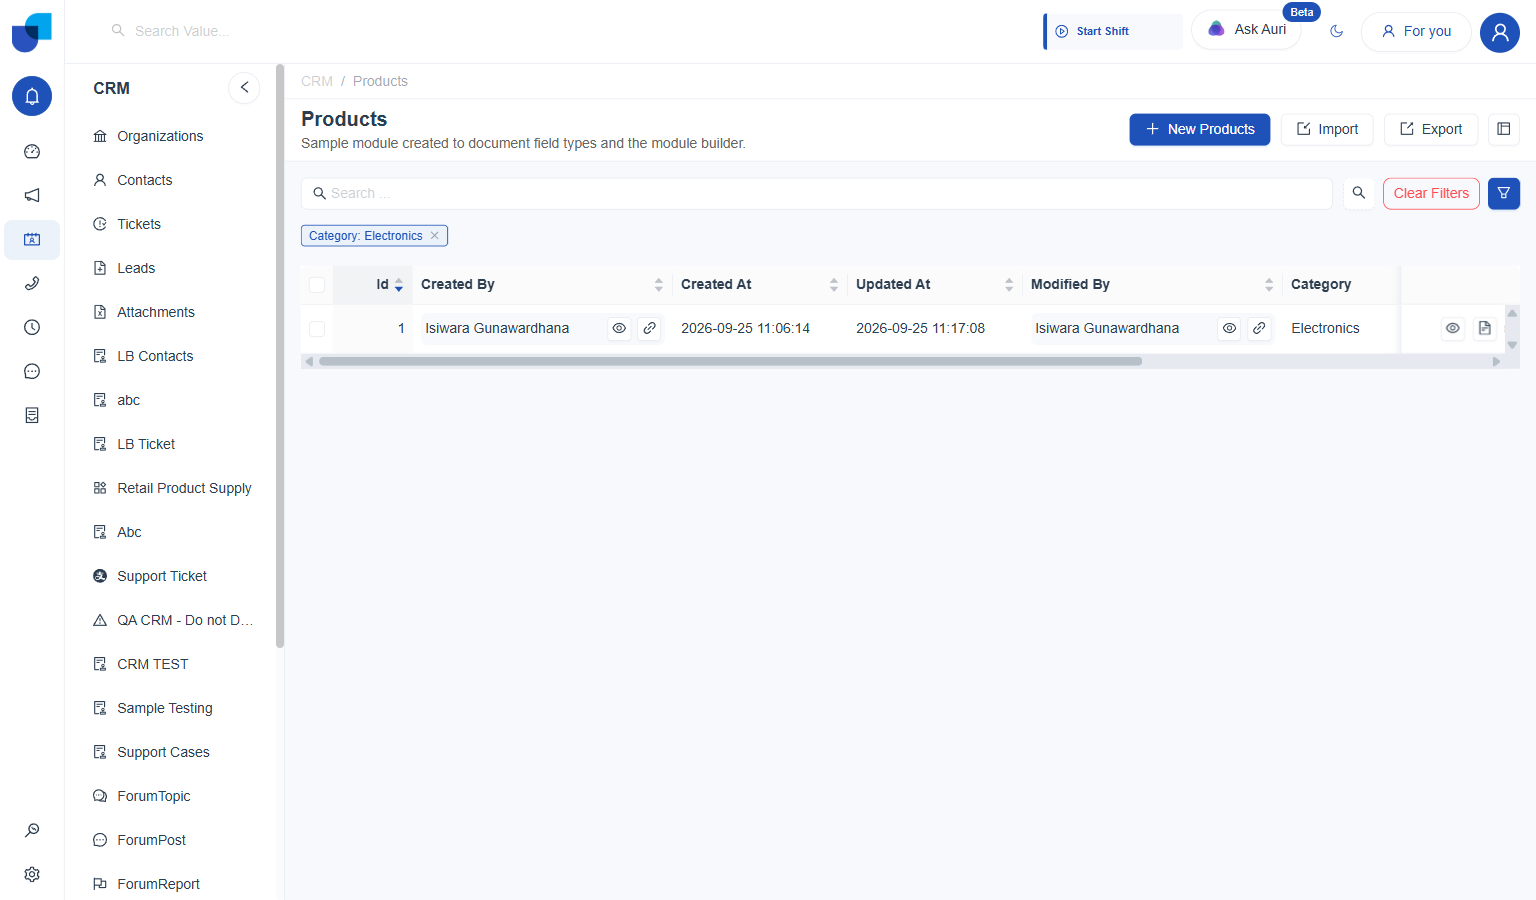
Click Apply. Save Filter and Apply both stay disabled until at least one condition is set. Clicking Apply closes the panel and replaces it with a visible filter summary above the list.
| Once applied | What changes |
|---|---|
Filter chip | Shows the active condition, e.g. "Category: Electronics," with its own × to remove just that one. |
Clear Filters | Appears next to the search box; removes every active condition in one click. |
Filter icon | Fills in solid blue while any filter is active, instead of its plain outline state. |
Save Filter | Keeps the exact condition combination for reuse, separate from applying it once. |
6. Importing Records
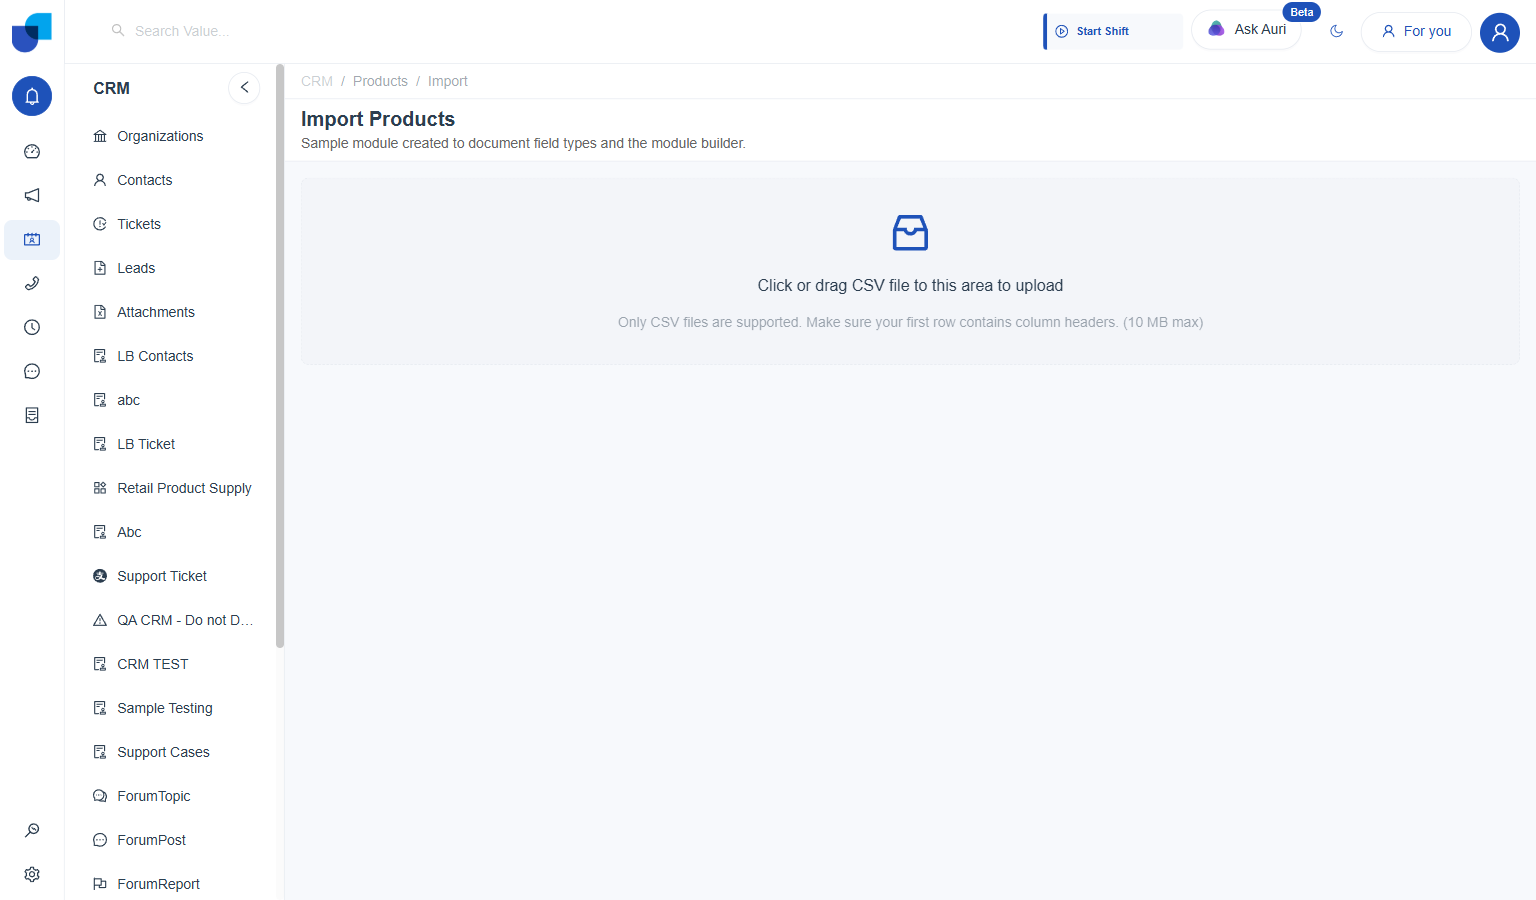
Import reads a CSV file and creates or updates records from it, matching each column to a field on the module. It opens on its own page, not a dialog.
-
Click Import. Sits next to New Products and Export, above the list.
-
Upload the CSV. Click or drag the file onto the upload area. Only CSV works, the first row has to be column headers, and the file cannot be larger than 10 MB.
-
Map each field. Every field on the module gets its own row. When a CSV column header already matches a field name, that field maps itself and shows the values found for it underneath, e.g. Category picks up Electronics, Apparel straight away.
-
Map relationship fields by hand, if needed. A field like Primary Contact needs two choices instead of one: which CSV column to read, then which field on the related module to match it against. Leaving both on Select CSV Header simply skips that field for this import.
-
Choose what happens on a match. Ignore skips a record that already exists, useful to avoid duplicates. Overwrite replaces the existing record with the new data instead.
-
Click Upload.
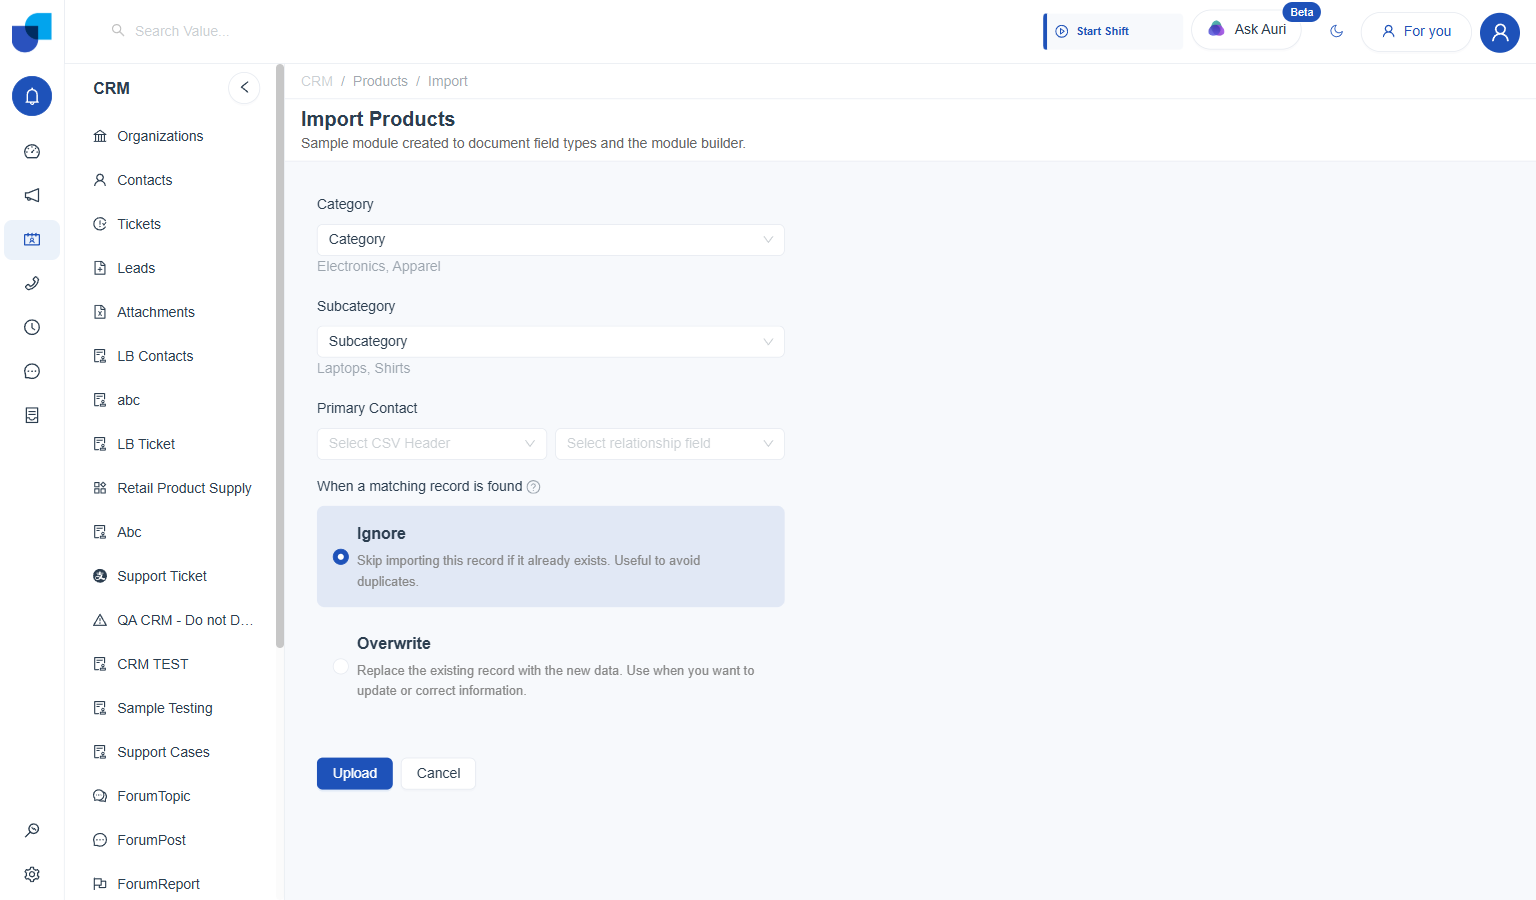 Category and Subcategory mapped themselves from the file; Primary Contact stays unmapped since the sample file had no matching column for it.
Once running, the import shows a progress bar with pause and cancel controls, then drops the new or updated records straight into the list:
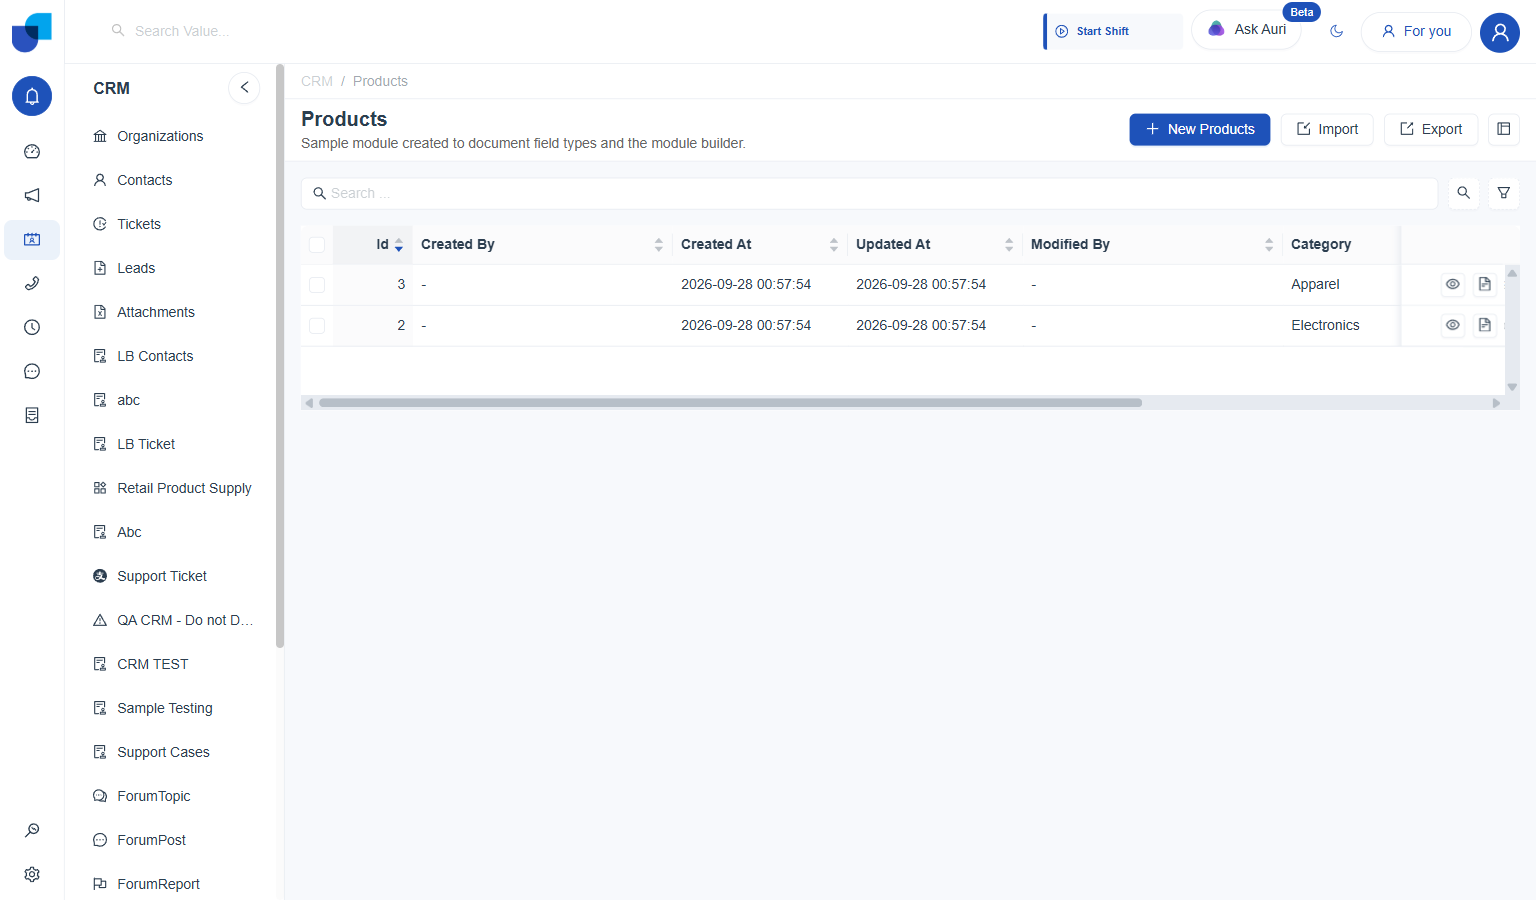 Two rows added from a two-line CSV file, each carrying only the columns that were mapped.
A field left unmapped is simply skipped for every row in that import; it does not block the rest of the upload. System fields like Id, Created At, and Modified By never appear in the mapping list, since the system fills those in on its own.
7. Exporting Records
Export is a single click, with no dialog and no field mapping. It downloads every record currently in the module as one CSV file.
-
Click Export. Sits next to Import, above the list.
-
The file downloads immediately. Named after the module and the day's date, e.g.
Products_20260927.csv, with every field as its own column, System fields included.
Export follows whatever is on screen. With no filter applied, it writes every record in the module; applying a filter first, covered above, and exporting afterward writes only the records that filter matches.