How to Manage Configured Modules
Configuration › CRM
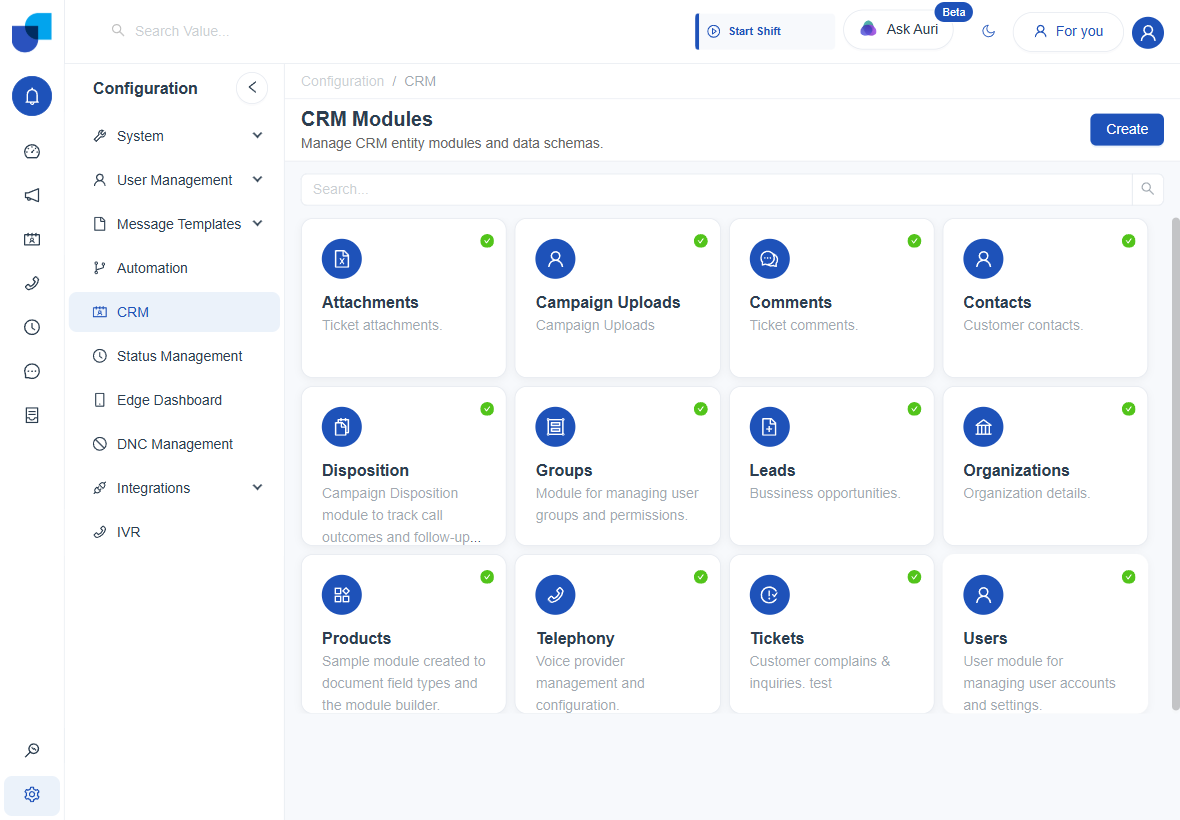
Every module that gets created, alongside the built-in modules, shows up as a card on the CRM Modules screen. From there, three actions cover the full lifecycle of a module: viewing its configuration, editing it, and deleting it. The steps below walk through all three using the Products module created earlier in this guide.
Viewing a Module
Opening a module card loads it straight into a read-only view, so nothing gets changed by accident while looking something up.
- Open the module. Click the
Productscard on the CRM Modules screen. - Read-only view loads. The module opens on the Module tab. Every field, including Module Name, Description, Display Fields, Module Icon, Source Type, Status, and Hidden, appears greyed out and cannot accept input.
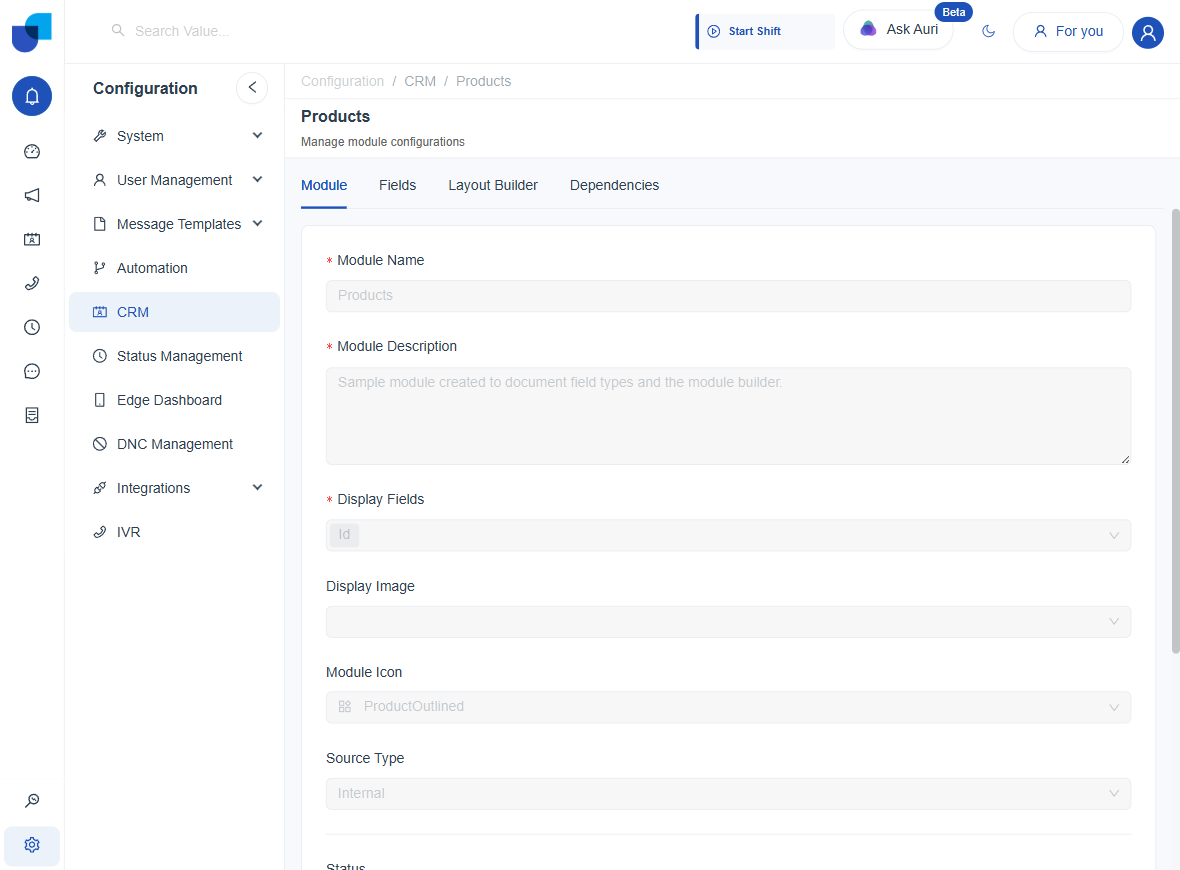
The Fields, Layout Builder, and Dependencies tabs at the top follow the same pattern for viewing that module's fields, layouts, and dependency rules. No separate "view" step exists for those either: each one is simply a tab on the same page.
Editing a Module
From the read-only Module tab, one button switches the whole form into edit mode.
- Open edit mode. Click Edit Module at the bottom of the Module tab.
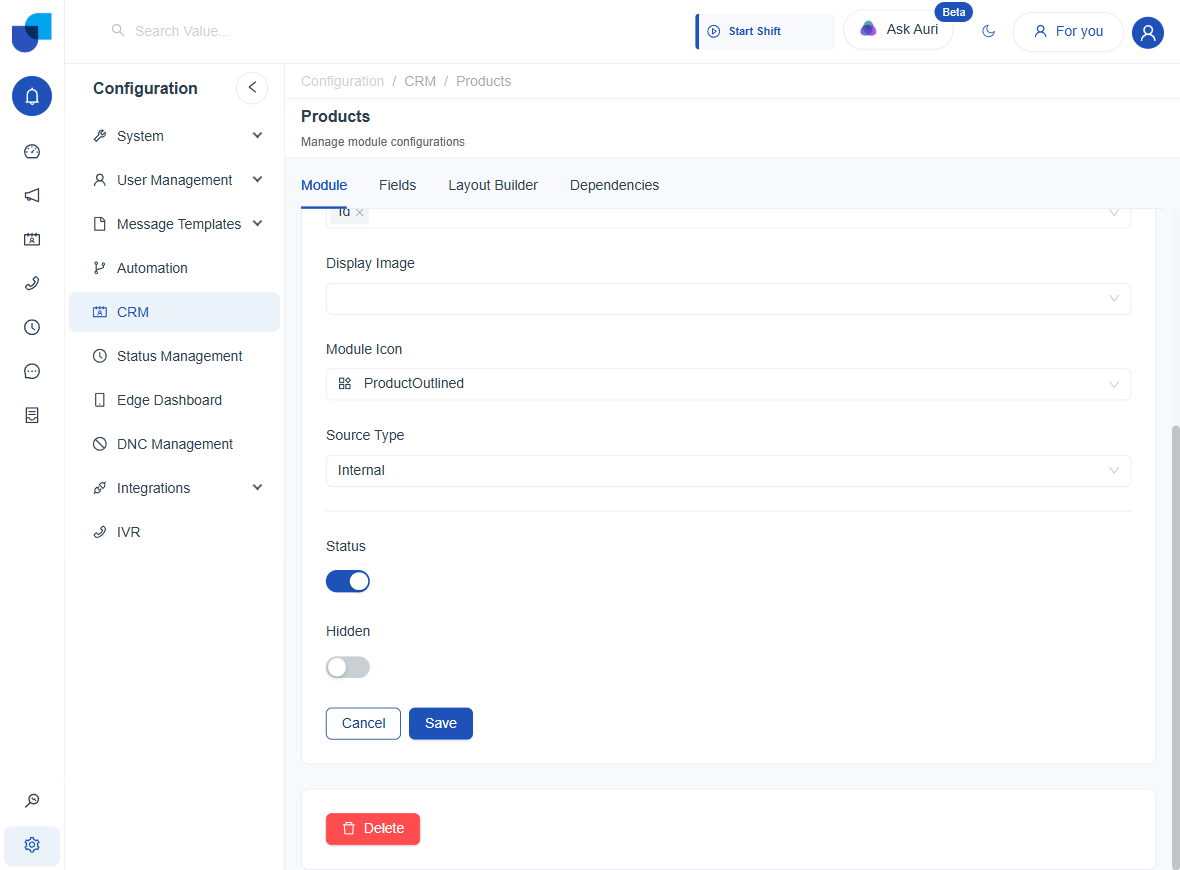
- Fields unlock. Every field unlocks at once. Module Name and Description become plain text inputs, Display Fields gets a removable (×) chip, and Display Image, Module Icon, and Source Type become live dropdowns.
- Save or cancel. Change the needed values, then click Save to commit, or Cancel to discard and return to the read-only view.
| Control | What changes in edit mode |
|---|---|
Module Name / Description | Static text becomes editable text inputs. |
Display Fields | Static tags become removable chips with an × to drop one field, plus the dropdown reopens to add more. |
Display Image / Module Icon / Source Type | Disabled dropdowns become live dropdowns. |
Status / Hidden | Disabled switches become toggleable switches. |
Save / Cancel | Appear only in edit mode, replacing the single Edit Module button. |
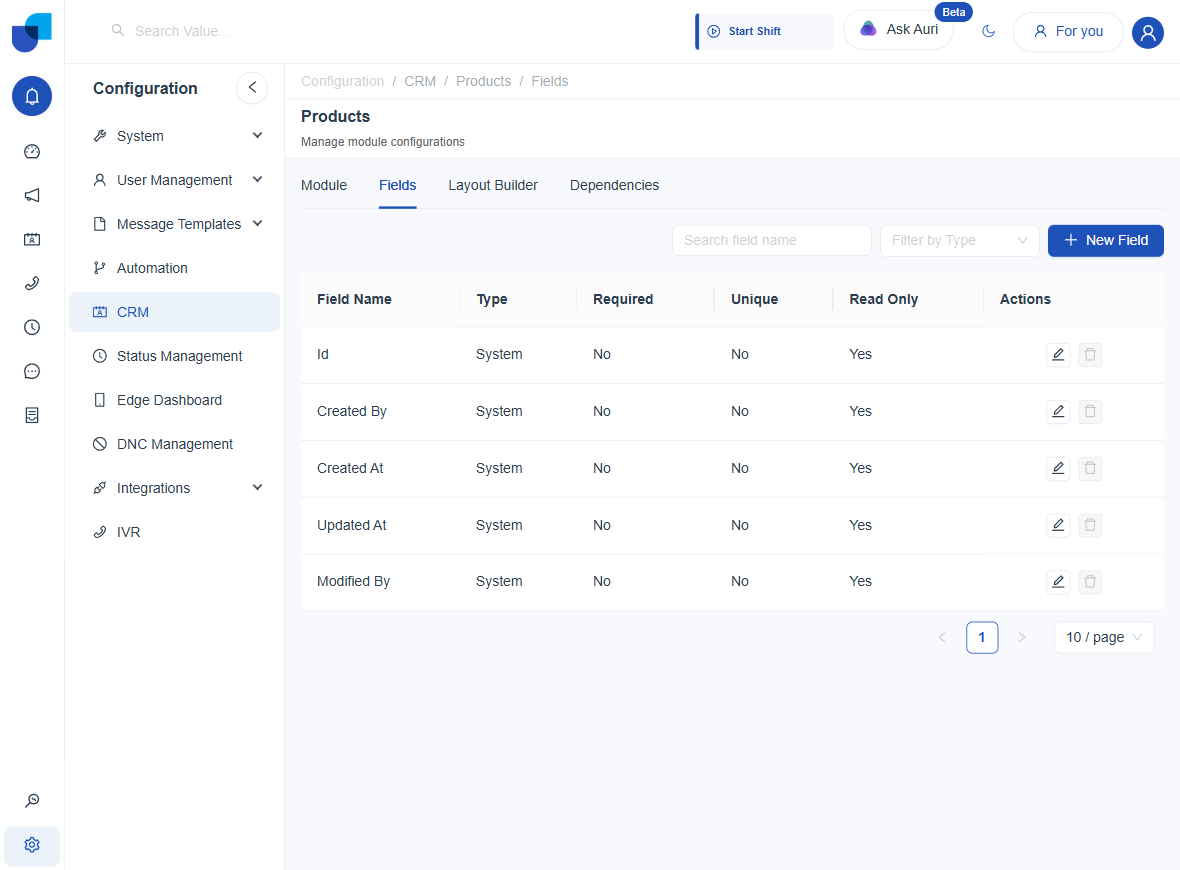
Individual fields get edited separately from this form, on the Fields tab, where each row carries its own pencil icon. Built-in System fields (Id, Created By, Created At, Updated At, Modified By) show a pencil icon too, but their delete action stays disabled, since the system populates their values automatically rather than through typed input.
Deleting a Module
Deleting a module removes it, and every field, layout, and record that belongs to it, permanently. The action sits next to Edit Module on the read-only Module tab and carries its own confirmation step to guard against an accidental click.
- Open the module. Go to the CRM Modules screen and click the card for the module to remove.
- Click Delete. On the Module tab, click Delete at the bottom of the page.
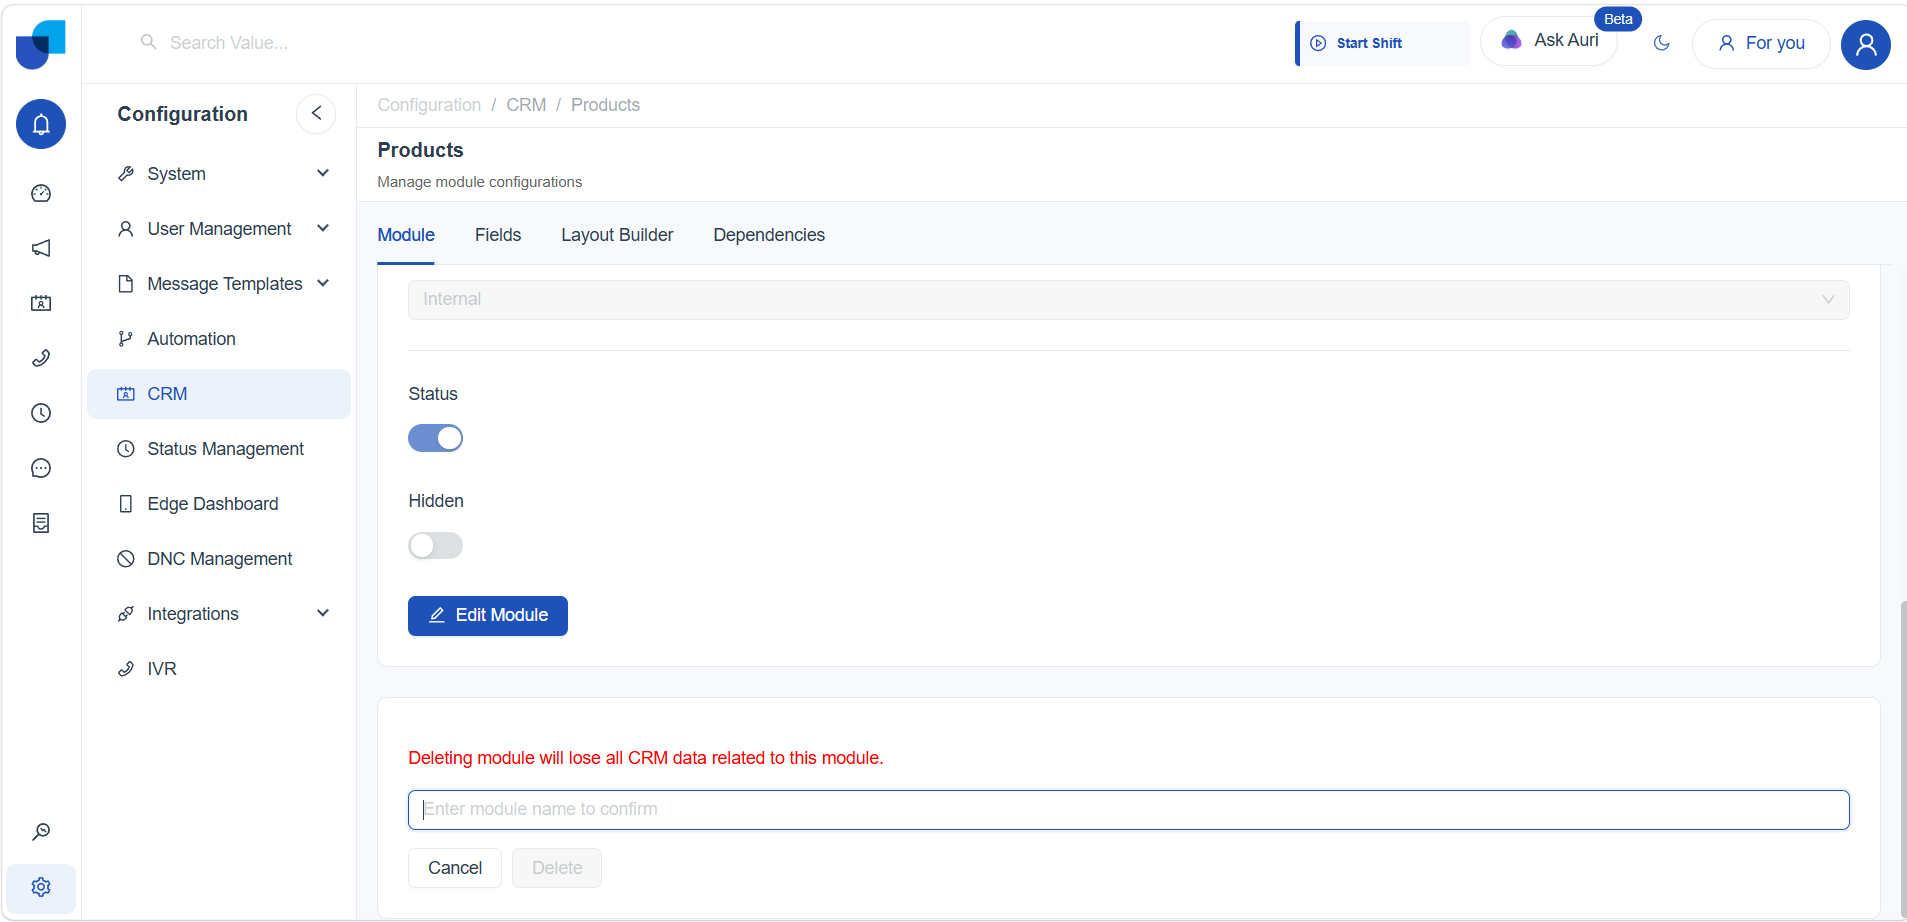
- Type the module name to confirm. A confirmation panel appears with a warning and a text field. Delete stays disabled until the module's exact name gets typed into that field.
- Click Delete. Once the typed name matches, Delete becomes active. Clicking it removes the module, its fields, and its data immediately; there is no undo. Cancel exits without changing anything.
Deletion cannot be reversed. Built-in default modules generally stay off-limits for deletion; this action is meant for modules created directly, like Products here.